Data Validation & Data Grid Colours
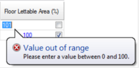
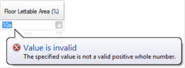
In basic value cells, there is always the scope for the user to enter an incorrect value. This could be due to a typing error, or a range-check error (e.g. entering a negative value or a value greater than 100 for a percentage). In these cases, the Tabular BTM will display a balloon tip to warn you about the problem and will not apply the change.
Some examples of these warnings are shown below:
The warnings will be displayed if you press the RETURN key to apply an invalid value. Note that they will not be displayed if you cancel the edit, click directly on another cell or move the mouse over the main application window – in those cases, an invalid entry will simply be ignored.
Configuring Data Grid Colours
The data grid uses colours for its cell text and cell backgrounds to show data of a certain type and to indicate rows that have been marked for editing. The cell text colour can be defined for the following types:
-
-
-
-
Aux. Vent and HVAC System “Use Main System” values
-
Plant Profile “Same As Heating Profile” value
-
Plant Profile “Same As Cooling Profile” value
The row background colours can be defined for the following types:
Setting Custom Colours
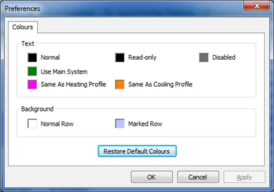
Although the Tabular BTM ships with a default set of colours defined for the above items, you can modify these colours to suit your own tastes. To configure the colours, select Preferences… from the Tabular BTM Edit menu.
The Colours tab shows you the colours that are currently applied to the different data types. To edit a colour, click on the relevant colour block:
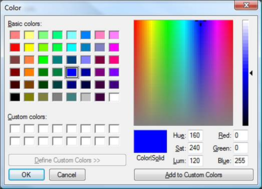
This will display the standard colour picker window, allowing you to select the colour you desire:
Once you have selected the colour you wish to use, click OK in the Color dialog. The Preferences dialog will then be updated to show you the new colour. Once you have finished modifying the colours for the different text and row types, click OK and the data grid will update to reflect your new colour scheme.
Restoring the Default Colours
If you want to restore all the colour choices back to their default values, simply open the Preferences dialog and click on the Restore Default Colours button – this will return each of the colours to their default values. You can then click OK to apply the colour changes.