Identify rooms is used to find all the bounded rooms in the model. Bounded rooms are geometrical surfaces that fully enclose a space or volume. The simplest form of this would be that a cube needs six sides to fully enclose the room. A non-bounded box (or selected surfaces) will be treated as Shading Surfaces.
Note: Shading devices will be used by the VE to shade the building. Examples of shading devices are overhangs or brise soleil. Surrounding buildings will also shade your building.
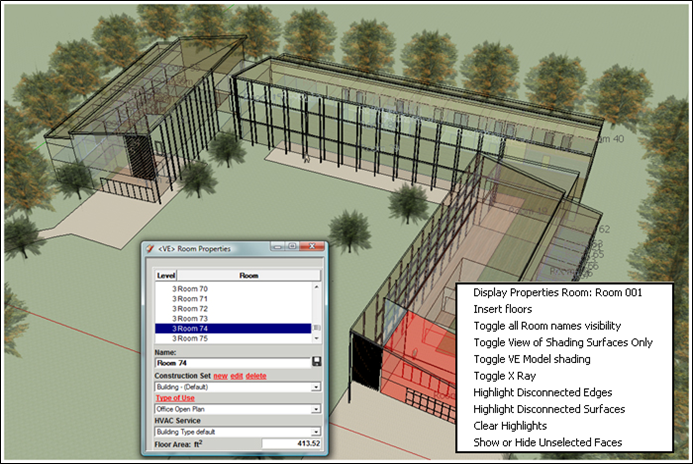
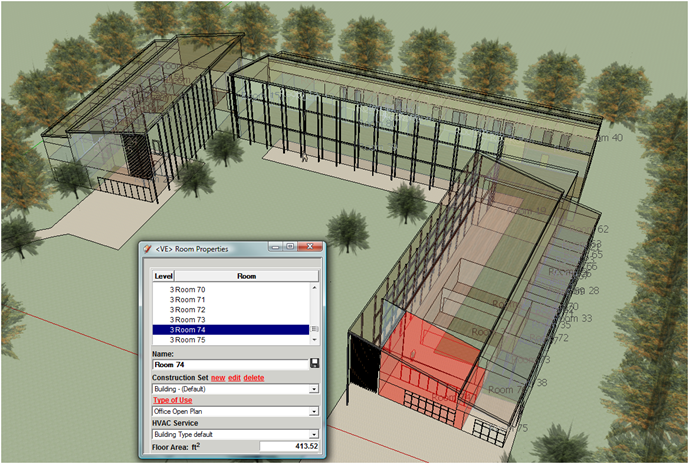
When rooms have been identified the IES<VE> Analytical model is displayed (in X-ray mode by default) and the <VE> Room Properties list is displayed showing details of all rooms that have been identified.
Set Room Properties
Set room properties; this dialog helps you set the constructions, type of use and HVAC system for the room(s) that you have selected. (Rooms can be selected from the list or by using the Select a Room button)
Use the SAVE Icon to save Room Names. Sort rooms and floors by clicking on the “Level” and “Room” column headings.
If construction set or HVAC service are not defined, it will inherit the constructions and HVAC system from the building properties that was previously defined.
Select, Display Properties & Insert Floors
Left click when the <VE> Room properties dialog is open to select rooms you want to edit.
Right click to get further options:
Display Properties Room: <Room Name>
Selection of this menu item opens the room properties menu for the selected room:
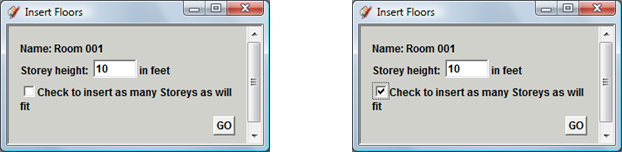
Insert floors
This is useful to split a single massing volume into single or multiple floors. One floor is drawn as a default to start, click on ‘Identify Rooms’, after the room has been found, right-click on the room, select ‘Insert Floors’. Select ‘Check to insert as many Storeys as will fit’, floors will be inserted based on the overall height of the volume automatically.

 Right click to get further options: