To follow will describe the central role CDB plays within the LCA module. Details of what areas affect the LCA module will be highlighted. To gain further insight into the CDB tool please refer to the relevant documentation.
CDB
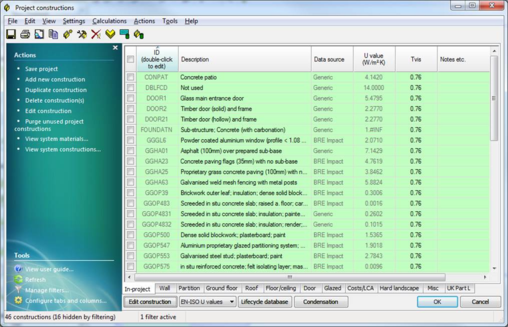
Click on the cdb button

within the LCA module to launch the CDB dialog:
LCA CDB fields
To follow is a summary of which CDB fields are relevant to the LCA calculation module.
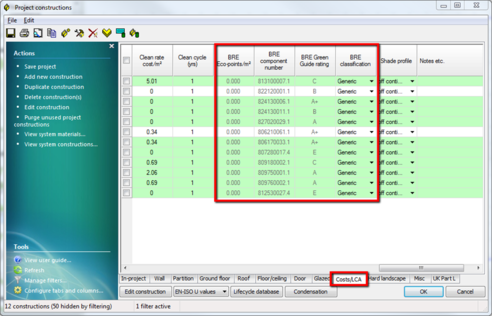
Select the Costs/LCA tab in the CDB module and scroll to the right of the table to reveal the highlighted columns (all non-editable). Note you can right click table heading and “manage columns” to add or remove unwanted columns.
BRE Eco-points/m2: details the ecopoints per m2 of this construction – currently not used.
BRE Component number: for Spec data only – unique id tied to this construction for LCA calculation purposes.
BRE Green guide rating: for Spec data only – the BRE green guide rating for this construction.
BRE Classification: Generic or certified – generic is a BRE generic construction, certified is generally a specific construction (see description of construction for more details)
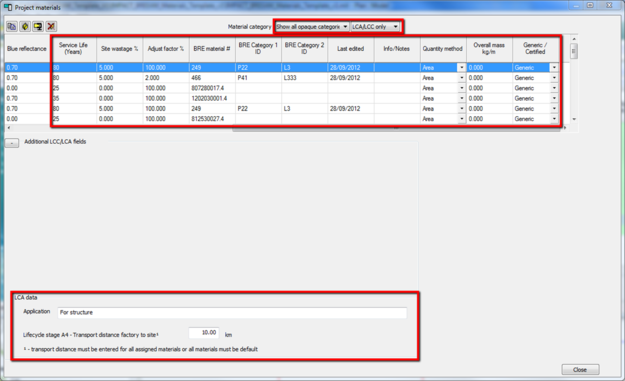
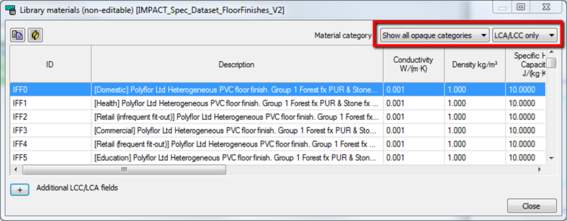
The project materials (accessed via button on editing a particular construction) dialog contains additional relevant fields for LCA.
Select Show all opaque and LCA/LCC only from the highlighted combo items:
Service life (years): How often material is replaced – this coupled with the period of study will adjust LCA calculations. A more frequent service life will generally increase the LCA outputs.
Site wastage %: How much wastage is produced when installing. Again if this is increased then so will the LCA outputs.
Adjust factor %: to account for instances where adjustment is required e.g. overlapping roof slates.
BRE material #: read only – unique BRE id used when calculating the LCA.
BRE Category 1 ID: read only – used when constructing composite constructions – see later section for details.
BRE Category 2 ID: read only – used when constructing composite constructions – see later section for details.
Last edited: date when this material was last edited.
Quantity method: currently area and length quantity methods are utilised in CDB materials.
Overall mass kg/m: for window and door perimeter calculations (quantity method length) – gives the kg/m value of the material.
Generic / certified: Generic or certified – generic is a BRE generic construction, certified is generally a specific construction (see description of construction for more details)
Lifecycle stage A4 – Transport distance factory to site:
Transport distances may be changed to reflect the actual distance. For all proprietary products and generic products where the source location is known (e.g. a specific type of natural stone), It is good practice to either enter actual transport distances OR remain with the generic distances throughout.
For products originating from a factory in the UK, enter a total distance from ‘Factory gate’ to site.
For products originating from a factory abroad (only distributed in the UK), enter a total transport distance from the UK port of arrival to the site. The International transport impacts are based on generic fixed rates per product/material type and cannot be changed.
LCA construction setup
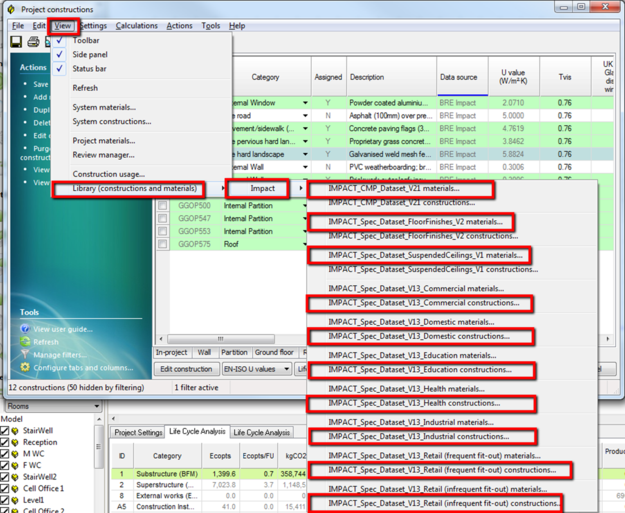
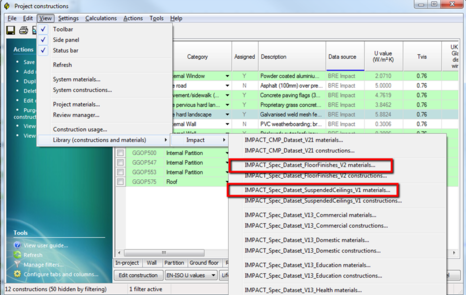
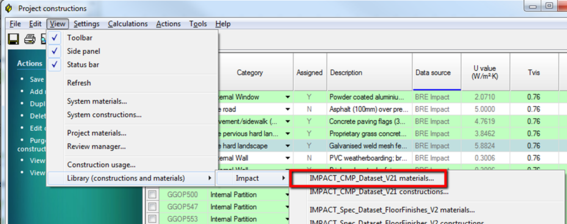
Several datasets have been imported to include LCA information – these datasets are accessed through the CDB interface via the view menu:
Available construction datasets
Two distinct types of datasets are available for LCA modeling; layer based and construction based. If a user wants to create a detailed construction made of multiple layers (materials, products etc.) they can use the CMP datasets. If the user wants to use pre-defined constructions they should use the SPEC datasets. A new LCA user would perhaps use the SPEC datasets then, once comfortable, move to the more advanced material based approach. Similarly, at the beginning of a project when evaluating building shape and broad construction types, the SPEC approach will be more time efficient and requires less detail. Later in the project, as more detail is developed, the user may progressively replace Spec based constructions with building-specific layer specifications – to increase accuracy of LCA results and reduce impacts still further.
CMP_Dataset_VX – this is a layer-level (material, products etc.) based set which allows the users to create constructions layered with multiple materials before assigning to the model.
All Spec_Dataset_vX (except floor finishes and suspended ceilings) – these are element-level (complete elemental constructions/specifications) based sets which allow the users to assign pre made constructions directly with pre-calculated LCA information attached.
Spec Floor finishes / suspended ceilings – as the VE does not have the facility to add multiple constructions to a surface – Spec based floor finishes and suspended ceilings must be added as a material layer to the overall Spec construction.
Please note for LCA calculations the thickness, conductivity, density, SHP, Resistance value of the Spec dataset is auto generated to maintain the target u value assigned by the BRE. Adjustment of the thickness value will not alter the LCA calculations (as is the case with CMP generated constructions). Model construction setup and assignment
It is recommended that the initial model setup is performed using the apache module
Apache toolbar:
To setup the model for LCA calculations the assign construction

and construction database

features will be utilized.
The general method to setup the model will be:
1. Setup constructions using the constructions database
2. Assign the newly created constructions to the current model using assign constructions
3. Switch to the LCA module to query the calculations
Spec construction setup
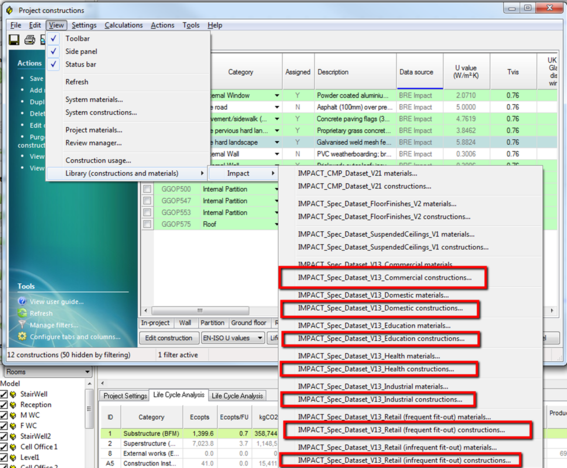
1. Select one of the Spec datasets from the view menu:
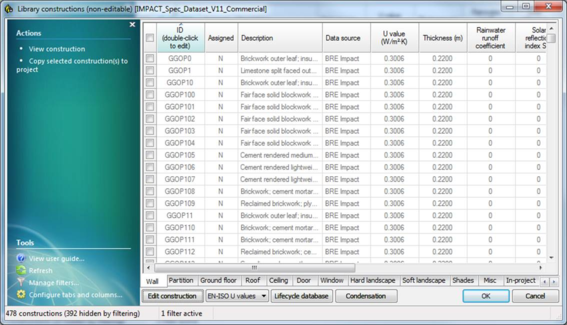
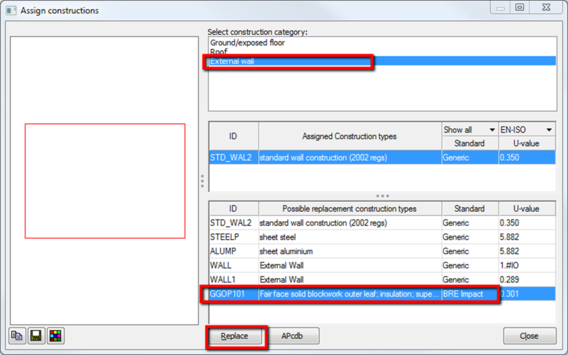
2. Selecting one of the red highlighted region will display the following dialog:
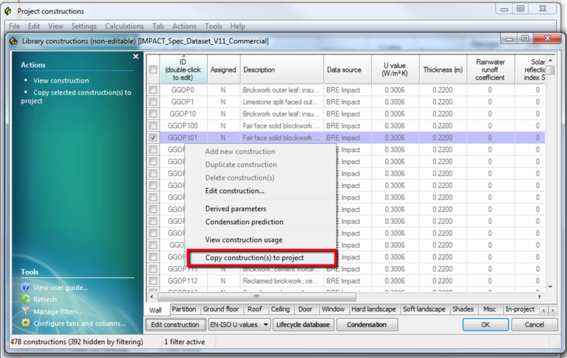
3. Choose one of the constructions and right click and copy construction(s) to project:
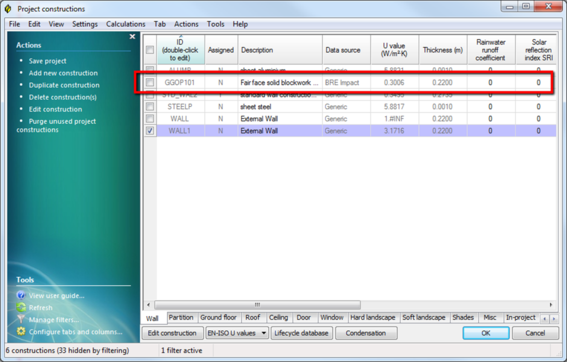
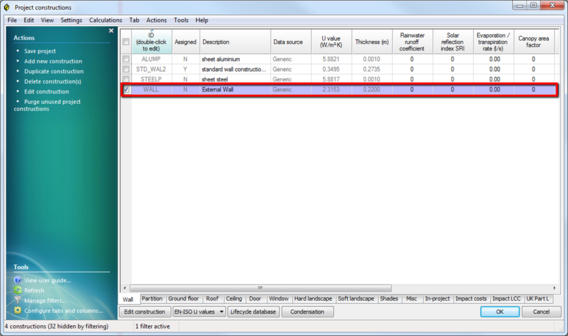
4. Construction will appear in the Project constructions list:
5. Press OK then use Assign construction to assign this to the current model:
6. Switch to the LCA module – create project as described above and choose element code 124 to produce LCA output:
Please note that each construction in the dataset will be assigned a dummy material, which has been classified into the “Unkown” material category.
Spec floor finish/suspended ceiling setup
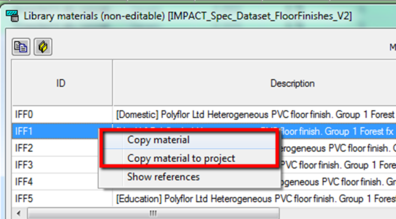
Open the floor finishes materials dialog:
Change filters:
Right click a suitable material and copy:
Edit ground floor or floor / ceiling construction and add layer into layers:
CMP construction setup (advanced)
CMP construction is an advanced feature to allow users to build constructions from layer-level database of products and materials. Please consult the Constructions Database help for additional details regarding BRE materials.
1. Switch to Apache module then select construction database
from toolbar:
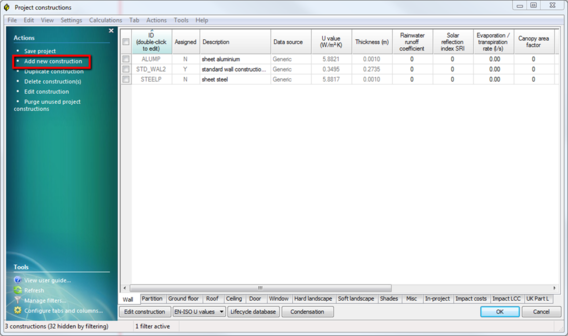
2. Click on the Add new construction link (a new construction will appear)
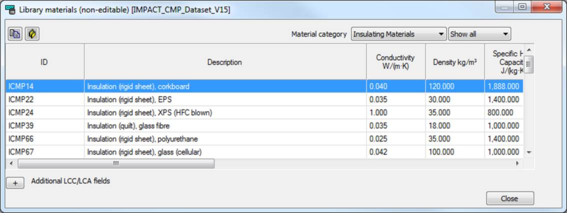
3. Open the CMP materials data set from menu:
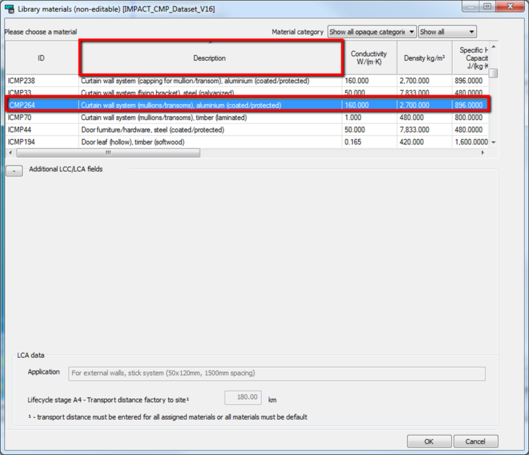
This will display the library of materials available:
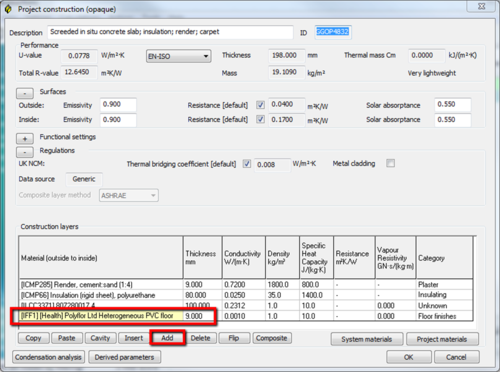
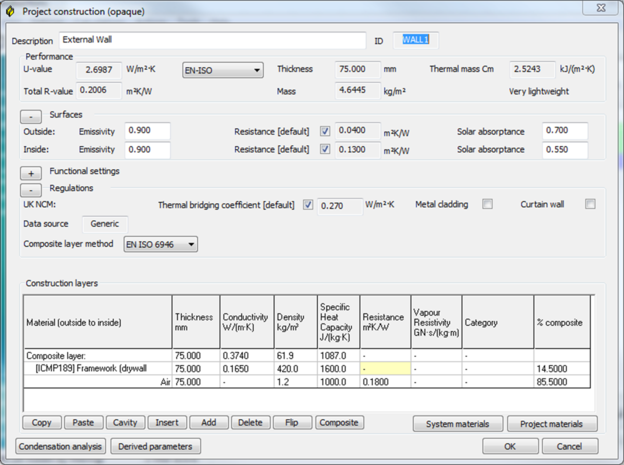
4. Double click the original construction added in step 2 to display the layers dialog:
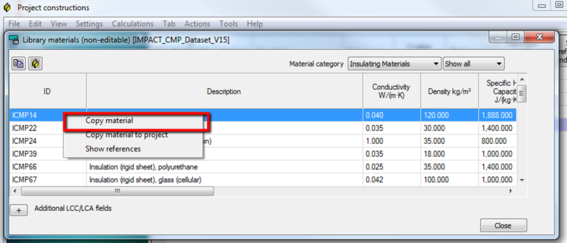
5. Choose material from Library materials dialog and right click and copy material:
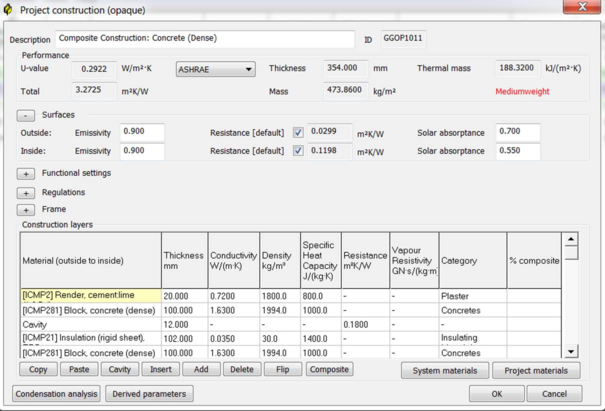
6. On the original Project construction choose Add (or paste)
7. Assign construction to model
8. Switch to LCA view and view results
Once initial model constructions are assigned users may then use the cdb button within the LCA module to alter constructions.
Composite layers
See CDB documentation section on BRE composite layer validation. A full detailed list of the composite layer and associated composite layer requirements can be found in the CMP_Dataset_LayerDetails.pdf located in the C:\Program Files (x86)\IES\<VE Folder>\apps\Help\LCA folder.
NOTES :
· Currently CDB will allow 1 composite layer per construction.
· In the event the user wishes to add composite layers will required to be input as separate layers. Please ensure thicknesses are equivalent and the adjustments % values of the layers are correct (normally add up to 100%) - in these cases.
· If composite layer does not contain a total of 100 % composite (e.g. stud walls) an additional air co layer can be added with the appropriate properties in place:
Example to determine co layer dependency:
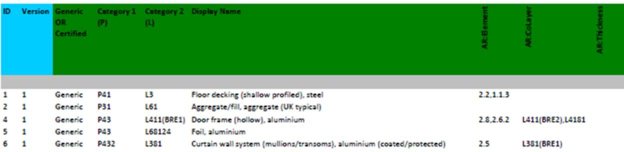
Curtain wall system requires Co layer L381(BRE1) – the corresponding co layer required is the Curtain wall system (fixing bracket), steel (galvanized) – which is ID 169 shown below. This means both of these layers must exist in a composite layer to be a valid LCA material.
In the VE the following method will result in a valid composite layer:
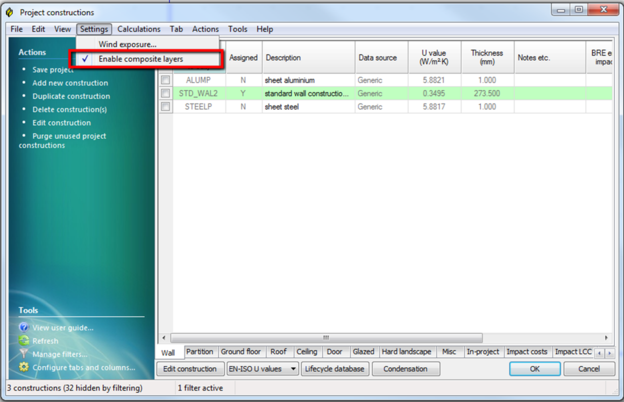
1. Ensure composite layers are enabled:
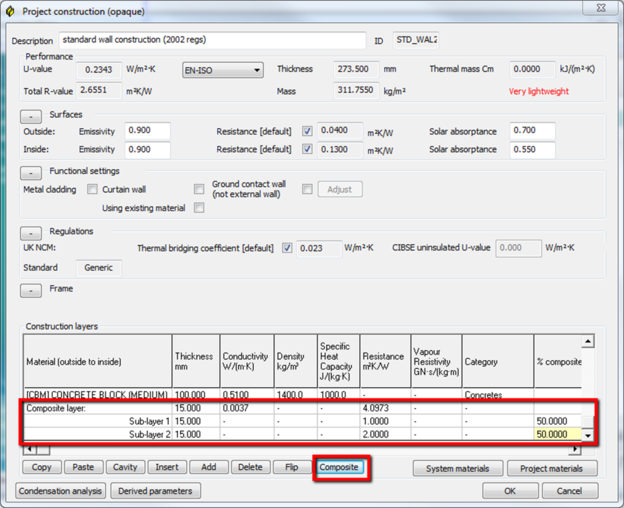
2. Edit construction and press Composite button – a composite layer will replace the currently selected layer:
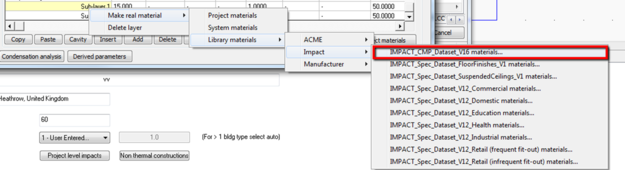
3. Right click a layer and choose the following menu item:
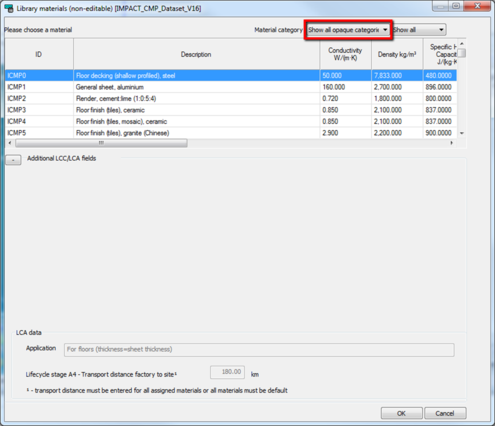
4. Select Show all opaque constructions from the material category menu item:
5. Click on Description column header to sort the material descriptions and find the curtain call system then select OK:
6. Repeat using the method above for the Curtain wall system (fixing bracket), steel (galvanized) layer.
7. When pressing Ok you will be given an adjustment warning – a requirement from the BRE is that all composite layer adjustments must add up to 100%. To adjust these open the project materials dialog and alter the adjustment values for each material – or enter text describing why you want to override. In this example there is no need to ensure adjustments add up to 100% as they are not continuous materials and may be hollow sections.
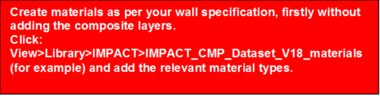
NOTE: When creating composite layers within a construction type; it is advised to create the material make-up as you would normally without any composite layers first.
Once the materials are added, it is recommended at this stage to add composite layers – this will reduce the number of warnings messages reported. If we click the OK button, a dialog will pop-up displaying which materials have to be included as a composite layer. In this case “Block concrete (dense)” must be within a composite layer. We then can check the CMP_Dataset_LayerDetail.pdf document to see which CoLayer we need to add. In this case we need to add L64 and L64(BRE1) which is mortar.
We then select the material which we want to make a composite layer and click the composite button which adds the composite layer with sub layers. If we right click> Make Real material>Library Materials we can then add the composite layers.
IMPACT LCC and LCA Service Lives for user guidance
Both the LCC and LCA data sets include service life data. For IMPACT library data these have been aligned with each other. However, there are some differences between the two datasets which should be noted, in particular if user-entered specifications are included, or default values are changed.
Note that certain finishes (e.g. floor coverings) will have a different reference service life depending on the building function selected. This reflects either different use conditions (for example wear and tear in communal corridors in heavily trafficked buildings) or different expectations for replacement cycles to reflect economic or aesthetic performance requirements (e.g. need to regularly “refresh” large retail facilities).
The LCC reference service life data covers replacement cycles. There are also maintenance cycles for the various repair and maintenance activities (major, minor, reactive, decoration and cleaning). Note that the amount of repair or maintenance assumed influences the replacement service life cycle – if more maintenance is provided to maintainable items generally replacement will be later, and vice versa.
The LCA reference service life data in the CMP dataset is for replacement cycles also. Although the tool has provision for individual repair or maintain cycles, these have not been used in the library data provided in Phase 1 of IMPACT. Also note that the LCA replacement cycles are for individual layers or materials, whereas these may form repair activities in the LCC dataset. For example, replace a plasterboard layer to a partition is a repair activity in LCC whereas it is a replacement activity in LCA.
If users provide their own service life data, or if they edit library service life they should note the following:
It will be necessary to separately enter new (user defined) specifications in each dataset.
It will be necessary to manually align the LCA and LCC datasets for replacement service lives. This may entail editing maintenance cycles in LCC where partial replacements occur of specific layers or materials.
If replacement service life data is edited or provided, the default LCC maintenance cycles should be checked and edited as required to align with the assumptions made for the replacement service life cycle.