In the iCIM project page, use the navigational tools of pan, zoom and orbit (as seen in the welcome page) to see the model from viewpoints.
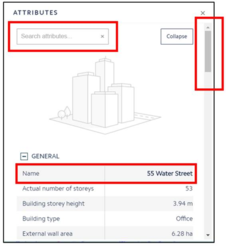
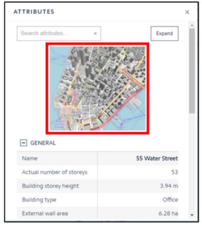
To view the data that was entered in iCD project click on any object, the attribute panel pops up. Search for any attribute by typing in the attribute name or use the bar to scroll up or down to search for the attribute.
To easily identify the building, the name of the building is the first attribute in the General section. After which the attributes are listed in an alphabetical order.
Figure 4.2.5.a: iCIM – Attribute Panel
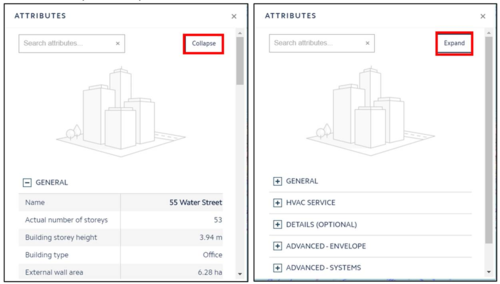
Use the Collapse or Expand button to minimize or maximize the attributes list.
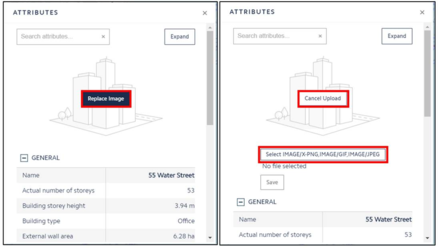
Hover the cursor over the image to get the option to replace the existing block image to a preferred image. Click on “Replace Image”. Then click on the “Select IMAGE/X-PNG,IMAGE/GIF,IMAGE/JPEG”.
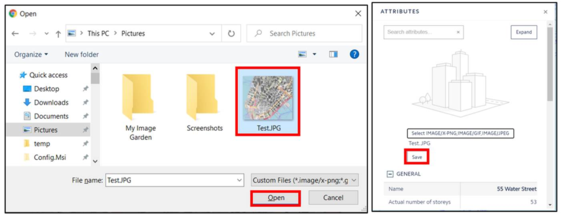
Clicking this will open the user’s default folder. Browse the computer and select the image to be uploaded. Click “Open”. Now that the image is selected, click Save. The image will now appear in the attribute panel.