The primary user can add or remove users to every individual project to share/access the project information with them.
To add a new user: Click on Add Member. Enter the email ID of the new user and select the Role of the user from the drop-down list. The options available to select are: Owner/Editor/Viewer.
Figure 3.1.1.e: Add Member Option
The 3 different roles give different range of access to the user:
6. Owner: As an owner the user will be allowed to make any changes to the project, update/delete the project or add any number of additional new users to the project based on their preference. There is no restriction to the number of owners that can be added to a project and every owner will have the same level of access and control on the project.
7. Editor: The Editor can make any changes to the project and update the project on iCIM via iCD. The Editor cannot rename, delete or manage users within the project.
8. Viewer: As a viewer the user can only open to view the project. They cannot rename, delete or manage users within the project.
Choose the appropriate option and select “Add User”.
Note, that any new user added in iCIM to a project, would need to be a registered user in our webiste: www.iesve.com with a valid login and active password.
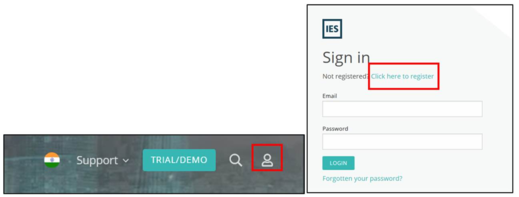
If the newly added user isn’t a registered user in our website, they will need to go to www.iesve.com, click on the login icon. This will redirect them to the login page. In here they will need to register by entering the required details. Once they have done so they will be able to log into the iCIM webpage.
Figure 3.1.1.f: Add IESVE User Option
To remove a User: Click on the remove user button.
Figure 3.1.1.g: Remove User Option
Note: The User who has been designated the Owner role cannot be deleted. The primary user will need to change the role of the user to either Editor or viewer before deleting the user.
Public Access: This allows the user to mark the project Private or Public.
Figure 3.1.1.h: Public Access
Clicking “Yes” – will all the project to be viewed by anyone with the project link without the need for authentication.
Clicking “No” – will ensure that the project can only be viewed by the users that have access to the project.
9. Open – Clicking on this opens the iCIM project.