It is good practice to tie room/space/zone volumes to levels / stories within your BIM model. At the outset of the project the inclusion of these should be considered and levels / stories created to accommodate the modelling.
Vendor-specific recommendations
Autodesk Revit: Levels
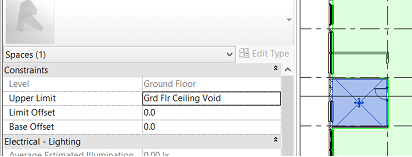
It is best practice not to use the offset function when placing rooms / spaces within Revit, except when placing roof level volumes. Place the room / space within the floor level in question, set the upper limit to the next level above and set the limit offset to zero.
Images from Autodesk Revit: Space placement Constraints and settings
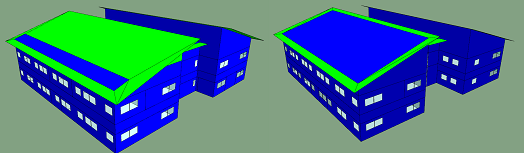
If the file imported has green ‘shade’ surface at the roof level then the room / space volumes placed are not protruding up through the roof construction far enough. Refer to example image left below.
Images from the Virtual Environment: Graphical view of model with model volumes not import correctly to the Virtual Environment (left) and when it is corrected (right)
To resolve this, either a new level needs to be created above the roof construction in the BIM model or the offset function utilised for the roof level room / space volumes placed within the model. All other volumes should be tied to levels in the model. Refer to example image right above.
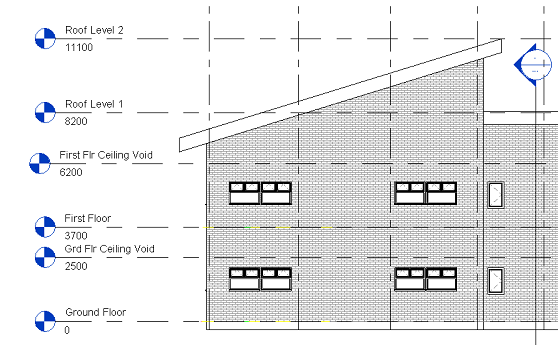
Image from Autodesk Revit: using levels to set up room/space volumes for export – elevation view
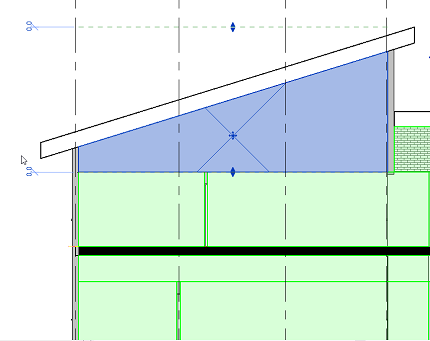
Using sections and turning ‘Room/Space’ fill on is a good way to interrogate if volumes placed in the model are to the levels required as shown in the image below
Image from Autodesk Revit: using levels to set up room/space volumes for export – section view of space volumes
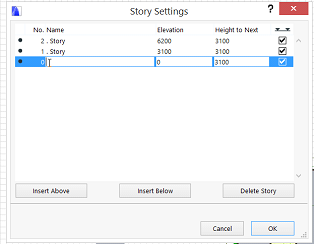
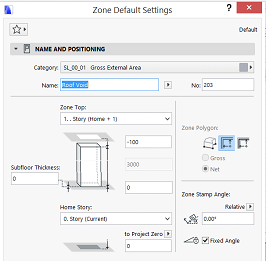
Graphisoft ArchiCAD: Stories
Stories should be set up within the ‘Story Settings’ dialogue and all ‘Zones’ tied to these. Edits can be made from the ‘Zone Default Settings’ dialog.
Images from Graphisoft ArchiCAD: Story & Zone settings