User Settings and Information
IES’s specially developed Revit plug-in Toolbar allows Revit® Architecture and MEP users to import their 3D BIM model into IES’s software and undertake sustainable performance analysis. It works with version 2008 onwards and sits as an integrated Toolbar.
The Revit plug-in is included in all IESVE software installations. If you already have Revit installed on your machine the Toolbar will automatically appear when you next open the application. VE-Ware and VE-Toolkits are designed exclusively for use with this plug-in to undertake early iterative assessments. VE Gaia and VE-Pro, allow you to edit model properties in detail, and undertake more advance analyses.
Settings and Info
Opens the IESVE Revit plug-in About dialog.
Here information for IES Technical Support can be found and settings such as Units and gbXML Export quality can be set.
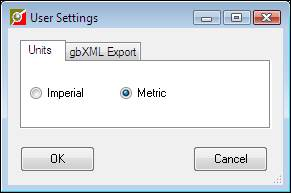
Settings
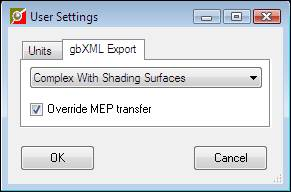
Click the Settings button to edit units (Imperial or Metric) and to define quality of gbXML Export when model is exported from Revit to <VE>.
Export Quality Settings:
|
Export type
|
Brief explanation
|
|
Simple
|
Simple means that Curtain Walls and Curtain Systems are exported with one complete opening with the total opening area equal to all openings combined; a curtain wall with 50 panels gets exported as 1 opening.
|
|
Simple With Shading Surfaces
|
Export with simple type and shading surfaces.
|
|
Complex
|
Complex means that Curtain Walls and Curtain Systems are exported with several openings, panel by panel; a curtain wall with 50 panels gets exported as 50 openings.
|
|
Complex With Shading Surfaces
|
Export with complex type and shading surfaces.
|
|
Complex With Mullions And Shading Surfaces
|
Export with complex type, shading surfaces and mullion. With Mullions mean that Mullions in Curtain Walls and Systems are exported as shading surfaces. A "simplified" analytical shading surface is produced from a mullion based on its centerline , thickness and offset.
|
Override MEP transfer : This option is available in Revit MEP 2010 onwards, when ticked the Set Model Properties dialog is displayed when Import Model is clicked. When unticked the Revit Export gbXML dialog should be used to set model properties prior to any export and analysis using the IESVE toolbar.
Help
Opens the IESVE Revit plug-in User Guide.
Guidance
Opens the “BIM + Building Performance Analysis Using Revit 2009 and IES <Virtual Environment>” White paper, provides extra guidance on using the link between Autodesk Revit and IES <VE>.
IES Website
Launches the IES website in an internet browser
Set Model Properties
The first step when using the IESVE Revit Plug-in is to click the Import Model button to pass the model from Revit to <VE> via gbXML. When this process is complete the Set Model Properties dialog will open displaying the model in a <VE> ModelViewer.
The Set Model Properties dialog allows the quality of geometry export to be checked and thermal data can be applied to the model before analysis begins.
Note: In Revit MEP 2010 onwards model properties are set in the Revit Export gbXML dialog. Access this by clicking File >> Export >> gbXML. When the model is ready click the OK button to close the dialog. Click the Import Model button to generate the IES Model Check Report before proceeding to analysis.
To use the IESVE Set Model Properties dialog instead please see Override MEP transfer in the Settings options (described above).
Check Model
Following the advice given in the “BIM + Building Performance Analysis Using Revit 2009 and IES <Virtual Environment>” white paper (available by clicking the Guidance button) the gbXML should be of a high quality but it is still very important to check the model has been properly exported before any analyses are performed.
Click the Check Model button

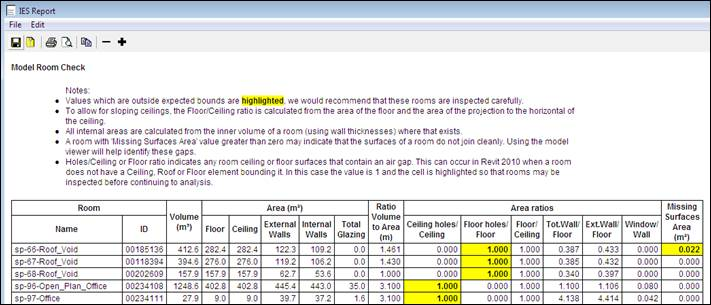
to generate the IES Model Room Check Report. This report gives information regarding the geometry of each room in the model with any values outside expected bounds highlighted.
Missing Surfaces shows rooms that may have gaps where surfaces do not join correctly. It is important these problems are identified and corrected as the missing area may allow light, solar
radiation and air flow thermal transfer between zones. This would affect the calculation results.
Ratios and areas of walls, floors etc should be compared to original designs to ensure all data has been correctly transferred to the <VE> model.
Holes to Ceiling/Floor can highlight rooms that are not properly bounded by a floor or ceiling/roof.

When the model data has been checked and confirmed then the IES Report can be closed and the check box can be ticked.
It will not be possible to set Model Properties until this has been done.