Once you have assigned the rooms in your model to HTM unit groups as appropriate, the model should be ready to simulate. The relevant Navigator actions will be enabled when you click the checkbox to the right of the Assign selected rooms to the appropriate HTM® system action (acknowledging that you have completed the action).
In order to proceed to simulation, you should perform the Ensure that all rooms assigned to HTM® systems are valid action – this will attempt to correct any problems with the HTM data on any room that is marked with an exclamation mark.
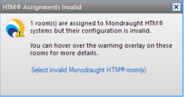
If one or more rooms could not be corrected automatically, an alert should display at the bottom-right of the VE window indicating the number of rooms that need manual attention.
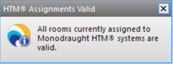
In this situation, you should review the problems for each invalid room by hovering the mouse over each room’s exclamation mark – you can then take appropriate action to resolve the issue and then retry this step. Once all assigned rooms are valid, clicking on action again should display the following alert at the bottom-right of the VE window:
You should then click the checkbox to the right of the Ensure that all rooms assigned to HTM® systems are valid action to enable the action for assigning HTM to an HVAC system file.
Applying HTM to an ApacheHVAC system file
In order to simulate HTM in your model using Apache, you must apply the HTM assignments to an ApacheHVAC system file (.asp) – this could be an existing HVAC system file that you already have set up for your building, or the VE can create you a new file that will represent just the HTM functionality. You then include the relevant .asp file in the simulation by selecting it as the active ApacheHVAC Link? file.
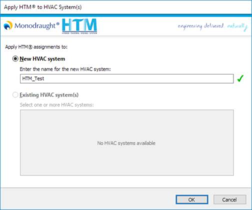
To apply your HTM assignments to an ApacheHVAC file, click on the Apply HTM® assignments to ApacheHVAC system files action in the navigator – the Apply HTM® to HVAC System(s) will appear:
You can choose to create a new .asp file containing the HTM assignments or apply the HTM assignments to one or more existing .asp files for your project.
To create a new .asp file containing the HTM assignments, click on the New HVAC system button and enter a unique name (excluding the .asp extension) for the new file. If the name is valid, a green tick (

) will be displayed to the right of the text field – otherwise, it will display a red cross (

). You can hover over the red cross for details on why the name cannot be used. When you click OK, the .asp file will be created with the name you entered.
To apply the HTM assignments onto one or more existing files, click on the Existing HVAC system(s) button and click the checkboxes next to the file(s) you want to add to. When you click OK, the file(s) you checked will be updated to include the HTM assignments. Note that the Existing HVAC system(s) button is only enabled if your project folder contains one or more .asp files. If you select a network file that has already had HTM previously applied, the HTM assignments will be updated to reflect the current set-up.
Simulate HTM performance using Apache
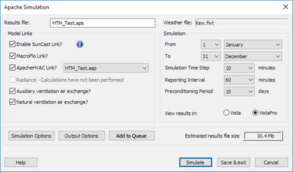
Once you have applied the HTM assignments to an ApacheHVAC system file, you are ready to perform a simulation. Clicking the Simulate System action under Thermal Simulation will switch to Apache view and prepare to run an Apache Simulation. In order to effectively simulate and view results for the HTM, the following simulation options are required:
- Enable SunCast Link? should be active
- MacroFlo Link? should be active
- ApacheHVAC Link? should be active, with an HVAC system file selected that has the current HTM assignments applied to it
- Auxiliary ventilation air exchange? should be active
- Natural ventilation air exchange? should be active
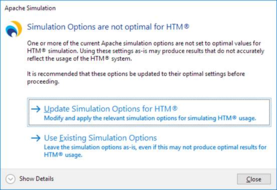
The Simulate System action will first check your current simulation options to see if they match these desired values – if not, a message will be displayed to indicate this:
You can use the Show Details button at the bottom-left to display information on which setting(s) are not at the expected value. If you would like the settings to be automatically updated to be optimal for simulating HTM, you can click the Update Simulation Options for HTM® button – otherwise, click the Use Existing Simulation Options button to continue with your current simulation options.
The standard Apache Simulation window should then appear, allowing you to configure which period you want the simulation to cover. Once ready, you can start the simulation by clicking the Simulate button.
Once completed, the VE should switch to VistaPro for viewing and analysing the results.