Overview
In order to start a new project, the user must first prepare basic input into a model that describes their building project. This model is called the UserModel . During the analysis calculation procedure, this model is used to automatically define the two compliance models:
1. The Proposed Design Model— the Proposed Design model is very similar to the User Model; however, some inputs such as schedules, plug-loads, and others are replaced with prescribed values specified in the NACM.
2. The Standard (Baseline) Design Model— the Standard Design model is generated according the Standard Design rules in the NACM. Users can think of this model as a hypothetical version of their building if it was designed to just meet the mandatory and prescriptive requirements of the Title 24 (Part 6) standards.
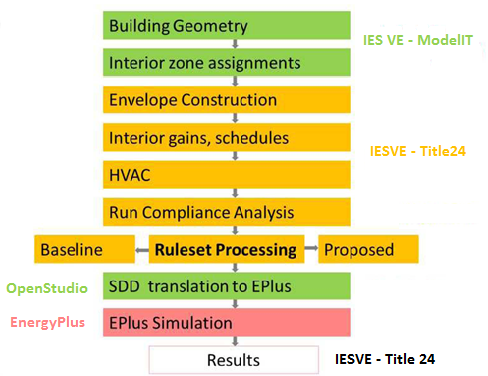
The workflow for preparing the User Model and performing compliance analysis is broken into several steps. While all data input, and the analysis procedure, can take place directly in the IES VE user interface, Trimble SketchUp can be used as an alternative way to prepare the geometry.
The workflow is illustrated in Figure 8. Additional details for each step in the workflow are also provided below.
Figure 8 - Workflow for Non-Residential Compliance Analysis
Importing Geometry
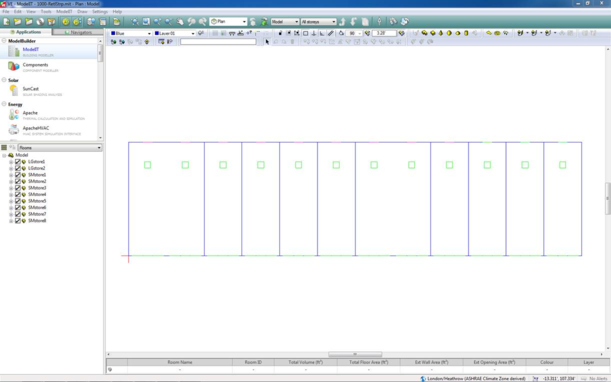
A building’s geometry can be imported via the IES VE module “ModelIT”, via SketchUp using the IESVE Plug-in for Trimble SketchUp, or via Revit using the IESVE Revit Plug-in.
ModelIT
For instructions how to use ModelIT module, please refer to the ModelIT User Guide available in the IESVE Support User Guide section of the IESVE website found
HERE .
Figure 9 – ModelIT View
IESVE SketchUp Plug-in
Please refer to the IESVE Plug-in for Trimble SketchUp User Guide available in the IESVE Support User Guide section of the IESVE website found
HERE .
IESVE Revit plug-in
Please refer to the IESVE Revit plug-in User Guide available in the IESVE Support User Guide section of the IESVE website found
HERE .
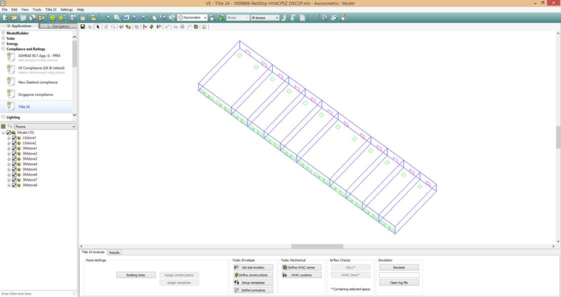
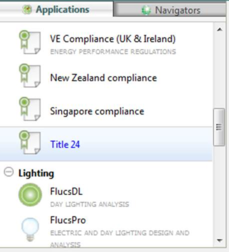
Title 24 Module User Interface
The Title 24 module can be selected from within the applications navigator on the left hand side of the Virtual Environment, in the Compliance and Settings section.
Figure 10 – Title 24 Module
Tool Bar
At the top of the workspace there is the Title24 toolbar, as seen in Figure 11.
Figure 11 – Title 24 Tool Bar
Table 1 lists the description of each icon in the toolbar. The grey coloured items are not pertinent to Title 24 modelling.
Table 1 – Toolbar Icon Description
|
Icon
|
Description
|
|
|
Save project files
|
|
|
Select Object
|
|
|
Assign Constructions (Please see Section 4.6 )
|
|
|
Edit Group Attributes
|
|
|
Assign Thermal Template (Please see Section 4.8 )
|
|
|
Layer Properties
|
|
|
Edit Selection Set Attributes
|
|
|
Apache Profile Database Manager (Please see Section 4.7 )
|
|
|
Apache Construction Database Manager (Please see Section 4.6 )
|
|
|
Apache weather/location database manager (Please see Section 4.5 )
|
|
|
Query (Please see Section 4.8.2 )
|
|
|
Edit Multiple Adjacencies (Please see Section 4.6.1.5 )
|
|
|
HVAC Zones (Please see Section 4.10 )
|
|
|
Input Data Visualisation (Model Viewer II) (Please see Model Viewer II (in Title24) user guide found HERE ) |
The main menu can be found at the bottom of the Title24 module workspace, where the Title 24 Analysis tools and Results can be accessed. Figure below shows a screenshot of the main Title 24 menu, when a thermal zone is selected in the workspace.
Figure 12 - Title 24 Analysis Menu when a thermal zone is selected
The table below provides a quick overview of the buttons in the Title 24 Analysis Menu, which are described in detail in the following sections of this document.
Table 2 - Title 24 Analysis Menu description
|
Icon
|
Description
|
|
|
Access the data of the selected zone
|
|
|
Tabular edit of the selected space(s)
|
|
|
Assign constructions to the selected space(s)
|
|
|
Assign Building template to the selected space(s)
|
|
|
Select the climate zone and the weather station
|
|
|
Access the constructions database manager
|
|
|
Access the templates manager
|
|
|
Access the luminaires dialog
|
|
|
Access the HVAC zones dialog
|
|
|
Access the HVAC systems dialog
|
|
|
Access the Building Story Data
|
|
|
Access the HVAC Zone dialog for the selected space
|
|
|
Trigger Title 24 compliance simulation
|
|
|
Command line to enter simulation options
|
|
|
Opens the log file created during compliance calculation
|