Luminaires may be placed singly or in arrays, and their beam centres may be pointed in any direction you required. The luminaires you place here may be used in FlucsPro and Radiance for artificial lighting calculations.
Lighting Database
The program has access to the IES lighting database that holds information about luminaires and lamps. FlucsPro and Radiance use the information from the database for design or analysis purposes. An extensive system database is provided but this can be supplemented with your own data.
Photometric data may be entered into the program either interactively or by importing from photometric data files in standard CIBSE, EULUMDAT or IESNA formats. The standard CIBSE type-1 and type-2 formats are used and are described in CIBSE TM14. For interactive input you describe the luminaire, the valid lamps for the luminaire, and polar-curve data for luminous intensities. Optionally, light-output ratios, spacing-to-height ratios, utilisation factors, and glare indices may be entered or calculated. For lamps the lamp description and, optionally, lamp-lumen maintenance-factor curves are specified.
The program can calculate light-output ratios, spacing-to-height ratios, utilisation factors, glare data and aspect factors and can perform LG3 checks and BZ classifications for a luminaire, based on the polar-curve information. The results can be viewed on the screen and output as hard copy if you wish.
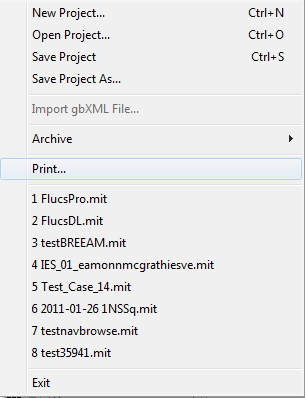
File Menu
The File menu handles file operations. Note that there are no options for opening LightPro project files because there is no LightPro project file. All the luminaires are stored in the ModelIT file.
All the options are the same as in ModelIT.
Edit Menu
The edit menu handles some of the space properties and CostPlan output.
Undo
This undoes the last change to the model. This applies to changes to light fittings and positions.
Redo
This redoes the last change to the model. See the comments above for Undo.
Site Rotation
This is not functional under LightPro. To change the site rotation, go to ModelIT.
Selection Set
This is only available when one or more rooms are selected. It displays the Selection Set sub-menu.
Custom attributes
This displays the Custom attributes dialogue box, allowing you to edit the attributes for all the selected rooms.
Assign templates
This displays the Assign template dialogue box, allowing you to assign the attributes for all the selected rooms to the values held in a template.
Output for CostPlan
This allows you to create output of all the luminaire data for CostPlan.
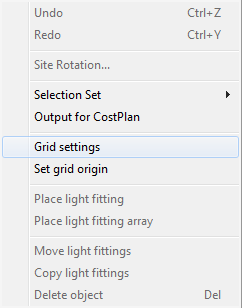
Grid settings
This allows you to edit the grid settings.
Set grid origin
This allows you to set the ceiling grid origin. Only available when you are in plan view and when the ceiling grid page is active. Move the mouse to the point where you want the new origin to be, and click.
Place light fitting
This allows you to place a single light fitting in the selected space, using the default light fitting settings. Only available when you are in plan view and when the ceiling grid page is active. As you move the mouse, the light fitting will be shown at the mouse position, after taking into account the ceiling grid snap option you have selected. Click the mouse to place it.
Place light fitting array
This allows you to place a rectangular array of light fittings in the selected space, using the default light fitting settings. Only available when the ceiling grid page is active. The Light fitting array dialogue box will allow you to set the number of fittings in the x and y dimensions. The placement will use the ceiling grid snap option and the default light fitting settings.
Move light fittings
This allows you to move the selected light fittings. Only available when you are in plan view, the ceiling grid page is active, and one or more light fittings are selected. As you move the mouse, the selected light fittings will be shown at the new mouse position, after taking into account the ceiling grid snap option you have selected. Click the mouse to reposition it. You may use the X=x,y , DX=x,y, or P=length, angle key-ins.
Copy light fittings
This allows you to copy the selected light fittings. Only available when you are in plan view, the ceiling grid page is active, and one or more light fittings are selected. As you move the mouse, copies of the selected light fittings will be shown at the new mouse position, after taking into account the ceiling grid snap option you have selected. Click the mouse to reposition it. You may use the DX=x,y , or P=length, angle key-ins.
Delete object
This allows you to delete the currently selected light fittings. Only available when the ceiling grid page is active and with selected light fittings. Note no confirmation will be requested.
View Menu
The View menu handles display control operations.
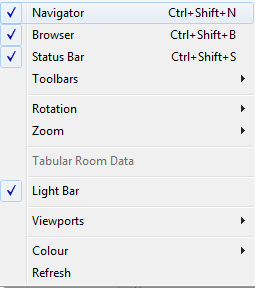
Navigator, Browser, Status Bar
These options are the same as in ModelIT.
Toolbars
The Toolbars sub-menu allows you to select which toolbars are displayed.
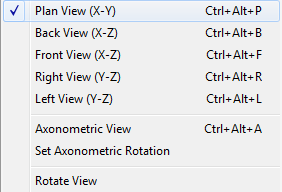
Rotation
The Rotation sub-menu allows you to switch the selected view port between the standard views.
All these options are the same as in ModelIT.
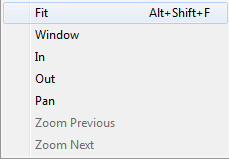
Zoom
The Zoom sub-menu allows you to set the zoom level of the selected view port.
All these options are the same as in ModelIT.
Tabular Space Data
Inactive in this version.
Light Bar
Display or hide the LightPro dialog bar along the bottom of the application.
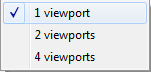
Viewports
The Viewports sub-menu handles the division of the view area into one, two or four viewports.
All these options are the same as in ModelIT.
Colour
The Colour sub-menu handles colour settings.
All these options are the same as in ModelIT.
Refresh
As in ModelIT. (Tip: Use the Esc key to abort a slow refresh, e.g. when filled contours are being displayed).
Tools Menu
All these options are the same as in ModelIT.
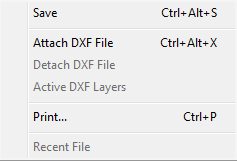
LightPro Menu
Save
This allows you to save the calculation results to file. Results are saved in any case at the end of a session.
Attach DXF File, Detach DXF File, Active DXF Layers
These options are the same as in ModelIT.
Print...
This option is the same as in ModelIT.
Recent File
This is inactive.
Settings Menu
The settings menu handles grid and lock settings.
Both these options are the same as in ModelIT.
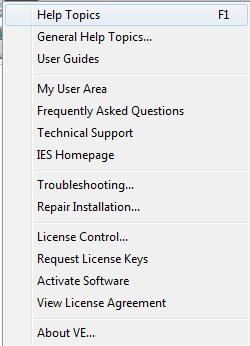
Help Menu
The Help menu gives access to the help information and all the standard licence handling, troubleshooting etc..
Help Topics
Displays this help file.
All other options
All other options are as in ModelIT.