Installing or Upgrading IES Software
Introduction
This section explains how to install or upgrade IES software on your computer. Specifically, it covers:-
· Upgrading your existing system
· Assembling the information you need for installation
· Type of installation
If you encounter problems during the installation, see Section 2, “Troubleshooting the installation”.
Before you begin:
· Assemble the information you need for the installation.
Upgrading Existing System
Visit the following link to download the installer for the latest version of the Virtual Environment
https://www.iesve.com/software/download/ve-for-engineers?id=451
Once the installer has downloaded place it on your desktop and double click to run the installer
Please follow the installation wizard on screen instructions while accepting our T&C's when asked to do so
If you have problems upgrading we recommend removing the previous version.
It may be the case that your existing application directory may contain project work or perhaps software licences; therefore we would recommend you backup your existing directory/hierarchy.
Assembling the Information Needed for Installation
Before any attempt is made to install the products from the IES Product Distribution DVD it is recommended that you carefully plan out the type of installation required at your site.
Default Installation Directories
Product Group Installation Directory
Modelbuilder }
VE-Value }
VE-Light }
VE-Cost }
VE-Mechanical } \Program Files\IES
VE-Electrical }
VE-Evacuation }
VE-Thermal }
VE-Solar }
VE-CFD }
Single/Standalone PC Installation
Installing the Applications
Visit the following link to download the installer for the latest version of the Virtual Environment
https://www.iesve.com/software/download/ve-for-engineers?id=451
Once the installer has downloaded place it on your desktop and double click to run the installer
Please follow the installation wizard on screen instructions while accepting our T&C's when asked to do so
IES Software Licence Directory
During the installation of the Libraries, a directory by the name of \KEYS is created under your application directory (C:\ProgramData\ies\apps\Keys), which is used to store important IES product information. This directory will store the licences issued to you by IES and cannot be moved after licences have been issued, since this will invalidate the licences. Should you wish to change the location of this directory, or address more advanced licensing issues, please refer to the Software Installation Guide; Network Installation – IES Software Licence Directory.
Once you have completed this process you may move on to the next section
Network Installation
Introduction
A number of factors can determine how you proceed with a network installation of the IES software and in this section we can cover the most important aspects.
In summary, a network installation requires the following steps:
Initial Workstation Setup
Server Setup
Client Machine Setup
Pointing your VE installations towards the network share
Using a UNC path
Requesting License Keys
License Keys Activation
Step 1 – Initial Workstation Setup
Thank you for choosing the Virtual Environment (VE). This guide will show you how to prepare a network installation for VE licensing.
Download the application (VE [Version xxxx].msi and the shared content (VESharedContent.msi) from our website and install it onto a workstation.
You will be able to obtain the latest version of the VE Applications and Shared Content (Standard Data and Weather Files) from the Download Centre on the IES website www.iesve.com
The Shared Content, (Standard Weather data & Weather Files), these files rarely change between versions and therefore will only need to be updated on an occasional basis.
On one of the client machines start the installation we recommend downloading and installed the VESharedContent.msi first and then the VE Setup .exe to ensure that all required pre-requisites are downloaded and installed in order for the VE to function.
Step 2 – Server Setup
It is now time to prepare the network installation (server) for VE licenses.
We require the VE licensing to be stored on a Windows-based physical server in the same office as the users requiring access to the license keys unless WAN licenses have been purchased.
To do this, please follow the steps below.
1. Select network location
2. Create a folder within this location. You can name this folder anything you wish.
3. Create a Shared folder within here and name it “IES”* and allocate share permissions. Users require full control access of these folders in order for the VE licensing to function correctly. The Share Permissions must be set to Change and the NTFS permissions must be set to Modify.
4. Within the IES folder, create another folder and name it “apps”*…..
5. ….and within this folder, create another folder called Keys.
You should end up with a file string similar to: X:\Software Licensing\IES\apps\Keys (X being the letter of the drive you picked).
*Note: Please note that the names of these folders are irrelevant. You can name them anything you wish. We recommend these names for the folders as it can aid with troubleshooting any issues with your network license keys.
Step 3 – Client Machine Setup
Pointing your VE installations towards the network share
Now that the VE is installed on your client machines and the network installation has been prepared for VE licenses, you will now need to complete the link by pointing the VE software towards the created network location.
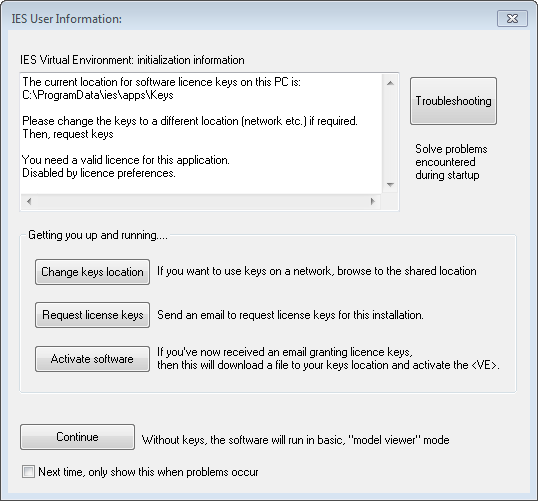
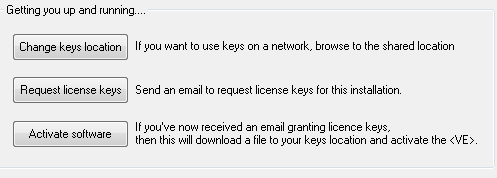
You can do this via the VE itself. When you load the VE you will be greeted with the IES User Information screen. On the User Information screen there will be a button called Change Keys Location (highlighted).
When you click this button, you will receive a prompt to set the license folder.
If you click the Browse button and navigate to the Keys folder we created in Step 2 and then click OK, the software will now be pointed towards the newly created network location.
Using a UNC path
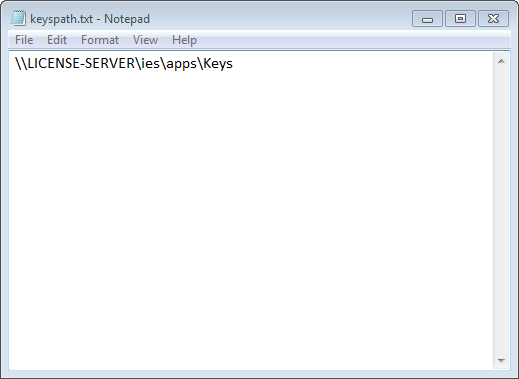
If you wish to use a UNC path to point your VE towards the Keys folder on the network share, you will need to create a keyspath.txt file and place it in the local Keys folder of each client machine that will be making use of the VE licenses.
Copy and paste the UNC path into a new Notepad .txt file. Once you have done this click File and then Save As. Set the file name as keyspath.txt and click OK.
Once you have done this, you will need to copy the file into the local keys folder. To do this you must first make sure that hidden files and folders are visible within Windows. To do this, please follow the steps below.
1. Open Folder Options by clicking the Start button , clicking Control Panel, clicking Appearance and Personalization, and then clicking Folder Options.
2. Click the View tab.
3. Under Advanced settings, click Show hidden files, folders, and drives, and then click OK.
Once hidden files and folders are visible, browse to C:\ProgramData\ies\apps\Keys and place the keyspath.txt file in this location overwriting any existing keyspath files.
Requesting License Keys
It is now time to request license keys.
When you open the VE on any client machine, you will be greeted with the IES User Information screen. On this screen there will be a “Request License Keys” button.
We require a default web app to be installed (e.g. Microsoft Outlook). If you do not have this available, please click the “Don’t Have Internet” button. This will create a keysrequest.txt file which will be available in C:\My Documents\IES\LogFiles. (Fig 5).
Once you have submitted your keys request successfully, this will send our Keys team all the information they require to set up your licenses and issue keys.
License Keys Activation
When your license keys for the Virtual Environment are available. You will receive an activation email from keys@iesve.com prompting you that the license keys are ready for download.
There are two ways to activate the license keys within the VE, the easiest being within the software itself. To do this load the VE on any client machine pointed towards the network share. You will notice that you are still being greeted with the IES User Information Screen.
If you click the “Activate Software” button, you will then be presented with the End User License Agreement. Please take time to read through the agreement (the End User License Agreement can also be access via Help >>> View License Agreement).
Once you have done this, please tick the acceptance checkbox and click “OK – I Accept”. You will then receive a message saying “Your licensing has now been re-set.” and you should now have access to the modules and navigators that have been purchased.
You can now proceed to point the rest of the client machines towards the network share. There is no need to request or activate the license keys again once they have been activated.
Should you require any further assistance or have any questions regarding your VE licensing, please do not hesitate to contact our keys team via email at keys@iesve.com or via the relevant phone numbers listed on the next page of this guide.
IMPORTANT:
If you wish to move the IES directory to an alternative location, it must be done before requesting licences from IES.
The licence directory must have read/write access permissions for all users. It is advised that KEYS.TXT has read-only permissions.
Re-directing the license directory can be achieved via the <Virtual Environment>. Simply select the “Tools > Administrative > License folder” menu option and navigate to the new alternative location.
If you have any questions/queries regarding installations you can contact us - Keys@iesve.com