Adding a Filter to an Existing Column
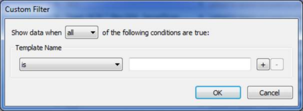
The quickest way of filtering is to simply define data filters on one or more of the columns currently visible in the tab. To do this, right-click on the column you wish to filter on and select Add Filter on <column name> from the context menu. This will display the Custom Filter window in its default state, as shown in the following example for Template Name:
By default, the window allows you to enter a single condition – the condition type can be chosen from the dropdown list, while you then type the condition value into the text box. The available condition types depend on whether the cell is textual or numeric. Textual data (such as Template Name, Heating Profile, System and so on) offers the following condition types:
- Value is “<your condition>”
- Value is not “<your condition>”
- Value contains “<your condition>”
- Value does not contain “<your condition>”
- Value begins with “<your condition>”
- Value ends with “<your condition>”
In comparison, numeric data (such as Lettable Floor Area, Furniture Mass Factor, Solar Reflected Fraction and so on) offers the following condition types:
- Value equals <your condition>
- Value does not equal <your condition>
- Value is less than <your condition>
- Value is less than or equal to <your condition>
- Value is greater than <your condition>
- Value is greater than or equal to <your condition>
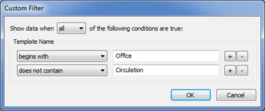
If you require more than one condition on a single column, you can add another condition row by clicking the + button:
If you have more than one condition defined, you can remove an individual condition by clicking on the – button next to it. Note that the order in which the conditions are defined is not important, and text values are not case-sensitive.
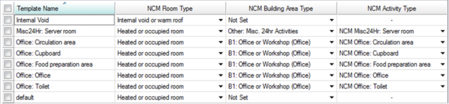
Consider the following templates:
If a Template Name filter was defined as in the previous example (begins with “Office” and does not contain “Circulation”), the results of the filtering would be as follows:
Only four of the templates can pass both conditions defined in the Template Name filter, so those are the only templates displayed in the tab. Note that the other templates are still selected – they are just being hidden from the grid by data filtering.
Identifying Filtered Columns
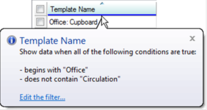
When a filter has been defined on a particular column, a blue identifier bar is shown at the bottom of the column header. This allows you to quickly identify which of the current columns have filters applied. In addition, you can get a summary of the filter if you move the mouse pointer over this blue bar:
Clicking the Edit the filter… link in the balloon will also allow you to make changes to the filter conditions.
Editing a Filter on an Existing Column
The process for editing a defined filter on a column in the grid is very similar to that for adding a filter. To do this, you can right-click on the column you wish to filter on and select Add Filter on <column name> from the context menu, or click on the link in the summary balloon (see previous section). This will display the Custom Filter window, pre-populated with the conditions defined in the filter:
The Custom Filter window functions in exactly the same way as it does when you are adding a new filter – you can use the + and – buttons to add and remove conditions on the filter and can configure the application of the conditions using the Show data when… dropdown.
Removing a Filter on an Existing Column
When a filter is defined on one of the columns in the active tab, it is trivial to remove the filter if you no longer require it. Simply right-click on the column you wish to remove the filter from and select Clear Filter from <column name> - the filter will be removed and the data grid will be refreshed accordingly.
Once the filter is removed, the blue indicator band will be removed from the column header.
Disabling Filtering on a Tab
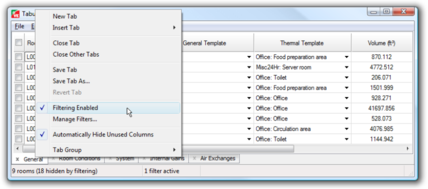
You can temporarily disable the effects of data filtering on a tab to show all selected templates in your model without actually having to delete the defined filters. This enables you to quickly compare the results of the filtered and unfiltered template attributes. Filtering is enabled on a tab by default, but you can disable it by turning off the Filtering Enabled item in the Tabular Edit Tab menu, or by right-clicking on the tab itself selecting the equivalent item from the pop-up menu:
When filtering is disabled, any columns with data filters applied will change their indicator bar from blue to dark grey – the grid will then refresh to display the template attributes for all selected templates.
To re-enable the defined filters, simply re-select the Filtering Enabled menu-item.