Exporting & Importing Space Data
In addition to the powerful support for data filtering within Tabular Space Data, you can also output your Space Data attributes as tab-delimited text. This enables you to view and manipulate the output using software such as Microsoft Excel, similar to the Export Space Data feature provided in previous versions of the Virtual Environment. However, Tabular Space Data takes things a step further by also allowing you to import data from tab-delimited text – this means that it is now possible to export the data, edit it externally as you require and then import it back into the Virtual Environment, with your modifications being quickly and easily applied across the rooms in your model. This can offer a significant time saving over previous versions of the software, which only allowed data to be manually input on a room-by-room basis.
The export and import feature provides a number of helpful features to make things easy for you to manage the data:
- Export either all columns in the current tab group, or only those in the active tab. This allows you to configure exactly what appears in the output.
- Exporting only takes account of the rooms visible in the grid. So, if you use data filtering, you’ll only get output for the filtered rooms, rather than all rooms. This means you can get the output for the rooms you are interested in, rather than having to get it for all rooms.
- Exported output is sorted based on the current sort column in the active tab. This means you can choose the sort order of the output prior to export.
- Importing previously exported data works regardless of whether the columns are visible in the current tab, or if the ordering of the columns differs in the output from that used in the tabs. If Tabular Space Data can identify the appropriate column from its header text, it will modify the value.
- Importing previously exported data also works regardless of sort order of the rooms in the output. Tabular Space Data will identify its rooms using the Room ID in the output, to ensure that the values are set on the correct room regardless of the order.
- Importing will also take account of the data format of the values, even if it differs from the currently active input format (e.g. data being imported is in IP, while the Virtual Environment is currently running in Metric). Tabular Space Data will do the appropriate conversion during import to keep things valid in the current input format.
- Full error-checking is performed when importing, with a list of issues being displayed on completion of the import process. This allows you to review all the errors in one place, rather than having to deal with repeated error messages while the import progresses – it also allows you to fix the problematic values in-place, if you want to.
This section details the process for exporting data and then re-importing it.
Exporting Space Data
If you want to export all the columns currently in use in the active tab group, you can either:
|
|
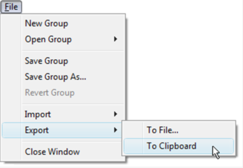
Select the To File… or To Clipboard item from the Export sub-menu of the Tabular Space Data File menu.
|
|
|
Select the Export to file… or Copy data from all tabs item from the side panel.
|
Alternatively, if you only want to export the columns in the current tab (not all tabs in the group):
|
|
Select the Copy Data From Current Tab item from the Tabular Space Data Edit menu.
|
|
|
Select the Copy data from current Tab item from the Tabular Space Data Edit menu.
|
Note that both of these items will always export to the clipboard.
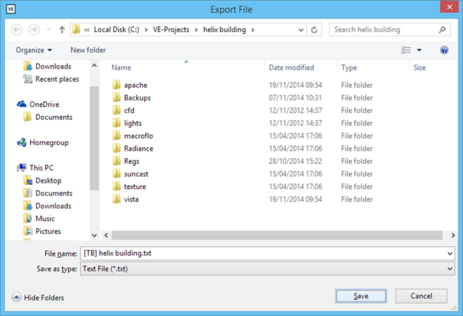
If you have selected to export the data to a file, you will be prompted to select the location to save the file to:
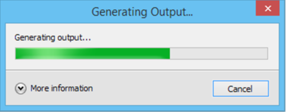
The export process will then begin – a progress window will be displayed if the output process takes more than a second or so, allowing you to get an estimate of how much time the export is likely to take as well as allowing you to cancel the export:
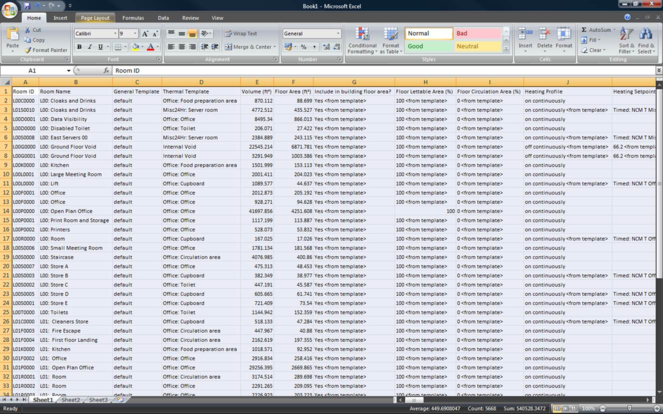
Once the progress window completes, your output is then ready to be opened or pasted. The following example shows the result of opening the data in Microsoft Excel:
Keywords in Data Output
Various Space Data attributes in the Virtual Environment need to reflect special flags as well as just their value. The most obvious of these is if a value is taken from the thermal template (and will therefore be automatically updated if the template assigned to the room is changed, or if the template itself is modified), but there are other special cases relating to systems and to the plant profile. In order to correctly maintain these in output, Tabular Space Data includes keywords in the data where they are needed.
The following keywords are currently recognized:
|
<from template>
|
Supported on all columns that can derive a value from the thermal template.
Indicates that the value is taken from the thermal template instead of being specified directly. This keyword overrides all other keywords.
|
|
<main system>
|
Supported on the Aux. Vent System and DHW System columns.
Indicates that the relevant system will match that set for the System column.
|
|
<heating profile>
|
Supported on the Plant Profile column.
Indicates that the Plant Profile will match that set for the Heating Profile.
|
|
<cooling profile>
|
Supported on the Plant Profile column.
Indicates that the Plant Profile will match that set for the Cooling Profile.
|
When a keyword is defined in a cell, any other value in the cell is disregarded during the import process. However, the export process does include the value alongside the keyword for informative purposes. So, the effect of applying the following would be the same in all cases:
- 100 <from template>
- 1000000000 <from template>
- Random <from template>
- <from template>
In all four cases above, the “From Template” flag would be set for the value and whatever value was defined in the template would be used.
Note that if you assign a keyword to a cell when its column does not support that keyword, it will be flagged as an error at the end of the import process (except for a column such as Room Name, which will accept any text input).
Editing Values with Multiple Units
One special case to be aware of when editing the output from the export process concerns values that can be displayed in multiple units. These are the following:
- Fixed Heating Capacity
- Fixed Cooling Capacity
- Flow Rate
- Free Cooling Flow Capacity
- Extract Flow Rate
- Max. Flow (Air Exchanges)
The default tab set-up for Tabular Space Data includes these values in multiple units. For example, the following output is for Extract Flow Rate in IP units:
|
Extract Flow Rate
(ac/hr)
|
Extract Flow Rate
(cfm)
|
Extract Flow Rate
(cfm/ft²)
|
Extract Flow Rate
(cfm/person)
|
|
0.9632
|
13.9684
|
0.1575
|
15.6902
|
Care must be taken if you want to edit this – the key thing to note is that values are applied left-to-right, so if you modify one value in one unit, you should clear the values in the other unit columns. For example, if you modified the Extract Flow Rate (cfm) to be 14.5, the following shows the wrong method and the correct methods:
|
Extract Flow Rate
(ac/hr)
|
Extract Flow Rate
(cfm)
|
Extract Flow Rate
(cfm/ft²)
|
Extract Flow Rate
(cfm/person)
|
û
|
|
0.9632
|
14.5
|
0.1575
|
15.6902
|
|
Extract Flow Rate
(ac/hr)
|
Extract Flow Rate
(cfm)
|
Extract Flow Rate
(cfm/ft²)
|
Extract Flow Rate
(cfm/person)
|
ü
|
|
|
14.5
|
|
|
|
Extract Flow Rate
(ac/hr)
|
Extract Flow Rate
(cfm)
|
Extract Flow Rate
(cfm/ft²)
|
Extract Flow Rate
(cfm/person)
|
ü
|
|
-
|
14.5
|
-
|
-
|
The first case would apply incorrectly because the Extract Flow Rate (cfm/ft²) and Extract Flow Rate (cfm/person) cases would be subsequently applied, thus cancelling out your change. Therefore, if you make a manual edit to any such multiple unit value, you should either blank out the other units or place a hyphen in place for them. This will ensure that they will be ignored during importing of the data.
Importing Space Data
Once you have completed any editing to the output in an external application, it is then ready to be brought back into Tabular Space Data to have the modifications applied to your model. As with the export process, you can import from either a tab-delimited text file on disk or from tab-delimited text on the clipboard.
Requirements for Importing
In order to begin the import process, you must ensure that the data:
- Includes all column headers. These are the first row in the exported output, so you must ensure that they are included when you attempt to import the data back to Tabular Space Data.
- Includes valid values for the Room ID column. This is what Tabular Space Data uses to identify which room is being modified, so it must appear in the data to be imported.
If either of these conditions is not met, an error message will be displayed to indicate that no valid data could be found for importing.
In order for the import process to apply changes, you must have all the required rooms selected in your model. You can ensure this by simply selecting all rooms in the model prior to importing data.
Selecting Data to Import
To begin importing data, you can either:
|
|
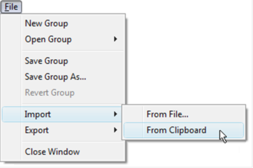
Select the From File… or From Clipboard item from the Import sub-menu of the Tabular Space Data File menu.
|
|
|
Select the Paste…item from the Tabular Space Data Edit menu.
|
|
|
Select the Import from file… or Paste from clipboard… item from the side panel.
|
Note: that importing from the clipboard is only enabled if there is text content currently on the clipboard.
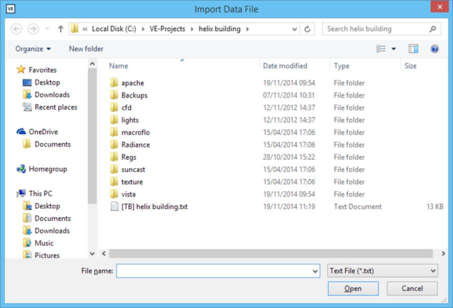
If you have chosen to import the data from a file, you will be prompted to select the location of the file:
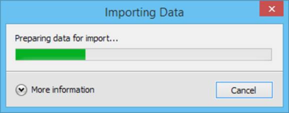
The import process will then begin – a progress window will be displayed if the import process takes more than a second or so, allowing you to get an estimate of how much time the import is likely to take as well as allowing you to cancel the import:
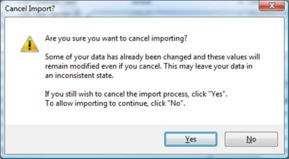
It is important to note that as the import process modifies the room attributes, cancelling it while it is in progress will result in some of your data potentially being modified and some of it unmodified – it is therefore your responsibility to ensure that the data remains in a valid state. A warning message will be displayed if you click Cancel:
Click No in this warning message to allow the import process to continue. Once the import has completed, the progress box will close automatically.
Error Handling
If the import process encountered any problems with the data for rooms, the following warning message will be displayed once importing is completed:
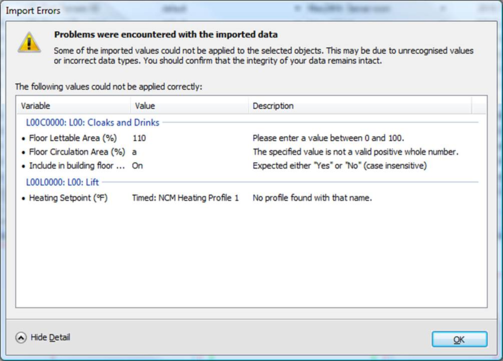
You can dismiss the warning at this stage, but it is very useful to see the details of what values went wrong in each room. To see this, click the Show Detail button at the bottom-right corner:
In its expanded form, the window shows a list containing each value that it could not apply, grouped by room (the group titles are in the form <Room ID>: <Room Name>). This allows you to quickly review the issues and decide on the best resolution.
One of the more powerful features of this list is that it allows you to fix the errors in-place if you want to. To edit a value, simply double-click on it in the Value column:
This will make the value be editable, allowing you to type in the corrected value. If the variable in question supports the use of keywords such as “<from template>”, you can also enter these into the edit box just as you would in an external editor (see the Keywords in Data Output section for details on supported keywords).
Apply your edited value by simply pressing RETURN once you are finished with the edit – if the value is now valid, it will be automatically applied and that error will be removed from the list. You can then continue to perform the same correction method on the other errors in the list. Once all errors have been fixed, the warning message will automatically close.
Note that you can close the warning message at any time by clicking the OK button – however, any remaining errors in the list will be ignored and their values in your data will not have been modified.
