Cost Dataset Installation
A single installer will be required per year for the construction and M&E costs updates for each dataset, which will contain a single file. A total of 4 installers per year will be required for TPIs and location factors updates for each dataset, which will contain two files.
Once subscribed and downloaded datasets from a particular provider and country, the installer will remove the existing installed datasets and place the newly installed dataset in the following location:
|
OS
|
Location
|
|
XP
|
C:\Documents and Settings\<username>\Local Settings\Application Data\IES\Value\Costs\<provider>\<country>\
|
|
Windows 8, 7, Vista
|
C:\Users\<username>\AppData\Local\IES\Value\Costs\<provider>\<country>\
|
Cost database dialog
The cost database dialog is to be accessed from the following existing VE interfaces: Project constructions tabular edit dialog (section 3.3 ), Project material dialog for materials of floor finishes and suspended ceilings type (section 3.4 ), Apache system dialog (section 3.5 ), and Cost plan toolbar (section 0 ).
Each opening of the cost database will be corresponding to the underlying object: either the current construction, or the current material (floor finish / suspended ceilings), or the current system, or the current cost plan element / sub-element.
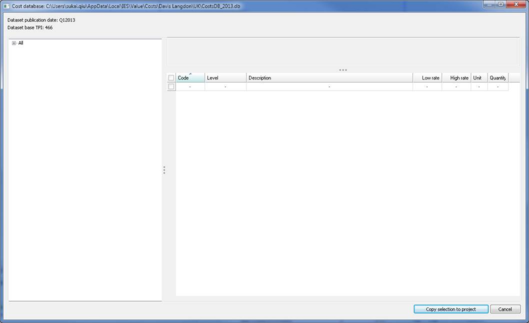
If the cost database is opened for an object that does not reference any database data, it will be displayed as follows:
Expand the tree on the left, gives:
All items on the dialog are read-only except from the “Quantity” column which is editable (default value is 1). Once any cost database data has been selected and referenced by an object, on subsequent opening of the cost database dialog, the referenced items will be highlighted as green and their previously entered quantity will be displayed. This is to aid the ease of editing of the current selection.
Cost database color scheme:
A selected cost grid item will be highlighted as orange ;
A referenced and selected cost grid item will be highlighted as green ;
A referenced and no longer selected cost grid item will be highlighted as greyish blue .
Once selection has made, click the button “Copy selection to project” return the aggregated low rate * quantity of all selected items, the aggregated high rate * quantity of all selected items and the cost database source back to the current object.
To highlight rates of an object that are lived linked to the current cost database, orange text color for lived linked rates are used.
The partition between the left pane and the right pane can be modified by dragging the vertical bar with the three dots; similarly, within the right pane, the partition between the top and bottom pane can be modified by dragging the horizontal bar with the three dots.
Global preference settings
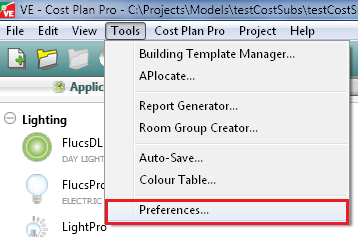
If users has subscribed to and installed cost data from multiple providers or countries, a default provider and a default country under this provider will be set on entering VE to determine which dataset to be used. To change the default settings, click on Tools -> Preferences ->Cost DB tab
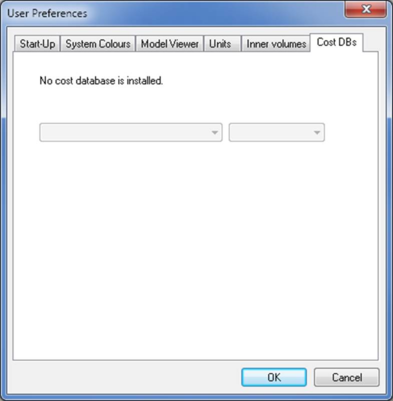
If no cost database has been installed, the Cost DB tab will show:
If the global Cost DB settings exist, the global country setting will determine the country of the coding schema to be used under the CostPlanPro / LCC. Please refer to section 3.7 for more details on the coding schema settings.
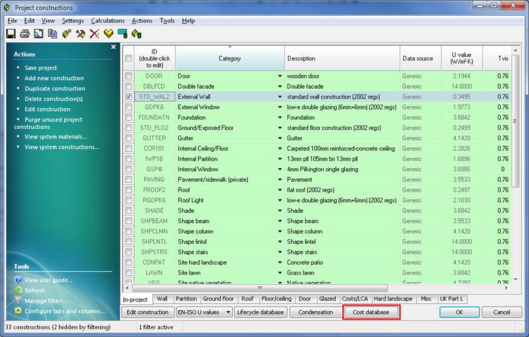
Constructions
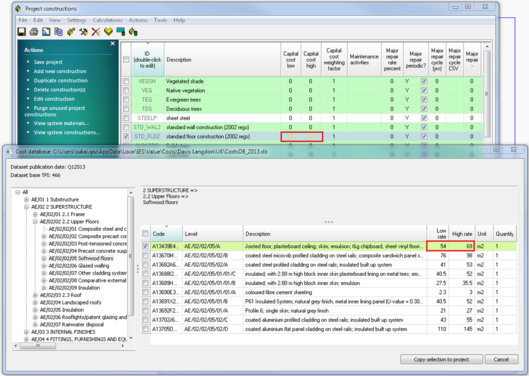
Select a construction. Then click on the Cost database button. Select any cost items with the desired quantity, then clicked the “Copy selection to project”. The total rates of the selected cost items will then be populated into the selected construction and displayed as orange text color. For example:
Manual editing either the capital cost low and capital cost high will result in losing the live links: the text color of both the capital cost low and the capital cost high will change back to black. On reopening the cost database, the cost database dialog will return back its initial unselected state instead of highlighting what has been selected previously.
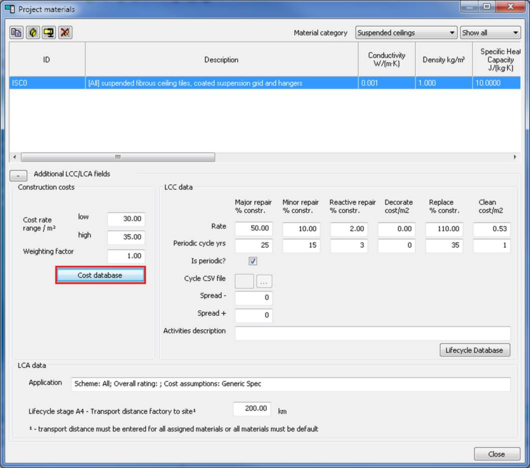
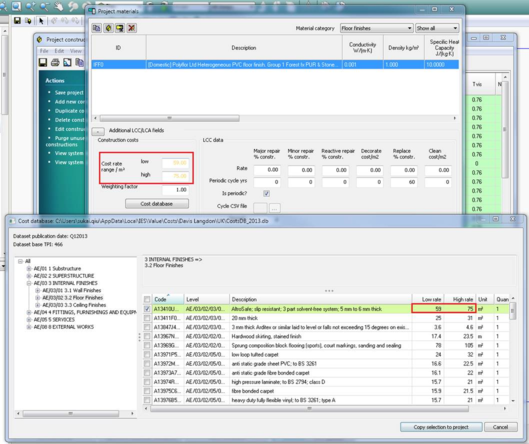
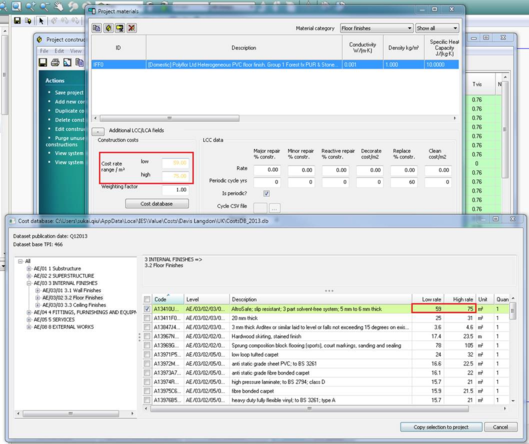
Materials
Select a material of floor finish or suspended ceilings type. Then click on the Cost database button. Select any cost items with the desired quantity, then clicked the “Copy selection to project”. The total rates of the selected cost items will then be populated into the selected material and displayed as orange text color. For example:
Manual editing either the low cost rate or the high cost rate will result in losing the live links: the text color of both low and high will change back to black. On reopening the cost database, the cost database dialog will return back its initial unselected state instead of highlighting what has been selected previously.
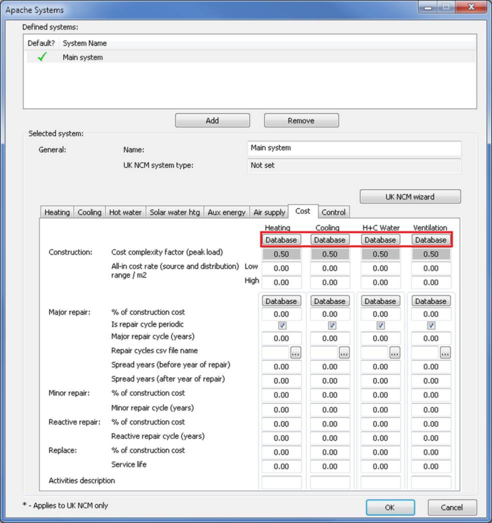
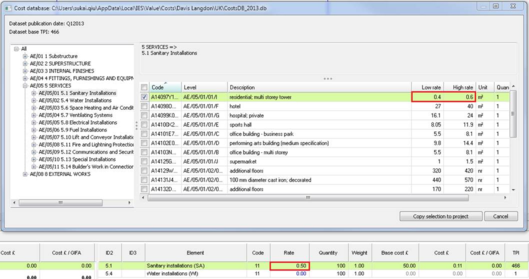
Apache systems
Select a system. Then click on the Cost database button under one of the energy section. Select any cost items with the desired quantity, then clicked the “Copy selection to project”. The total rates of the selected cost items will then be populated into the selected system under the selected energy section and displayed as orange text color. For example:
Manual editing either the construction low or high will result in losing the live links: the text color of both the low and high will be changed back to black. On reopening the cost database, the cost database dialog will return back its initial unselected state instead of highlighting what has been selected previously.
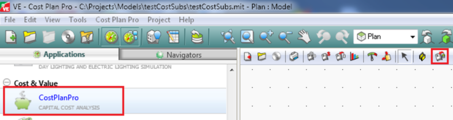
Cost plan elements / sub-elements
Select a cost plan element or sub-element. Then click on the Cost database toolbar button shown above. Select any cost items with the desired quantity, then clicked the “Copy selection to project”. The total rates of the selected cost items will then be averaged and populated into the current element or sub-element and displayed as orange text color. For example:
The text color under Cost Plan will only be displayed when a row is not highlighted:
Manual editing either the construction low or high will result in losing the live links: the text color of both the low and high will be changed back to black. On reopening the cost database, the cost database dialog will return back its initial unselected state instead of highlighting what has been selected previously.
To distinguish rates coming from different sources, text color scheme is used.
Predefined rates from costs templates or from other modules (CDB, Apache system) are considered as auto data; other rates are considered as user-entered data. Rate coming from the current cost database are considered to be live data; otherwise it considered to be non-live data. The following table has defined the used text color scheme for element / sub-element rate:
|
|
Live data
|
|
Auto data
|
|
Y
|
N
|
|
Y (Non user-entered)
|
Dark red
|
Black
|
|
N (User-entered)
|
Orange
|
Blue
|
Coding schema
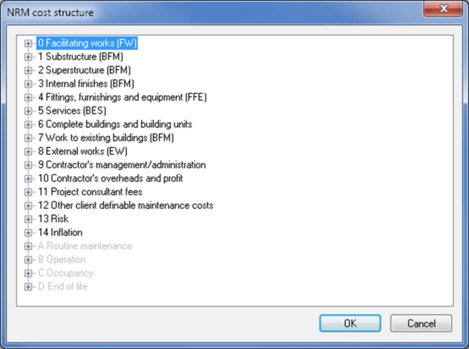
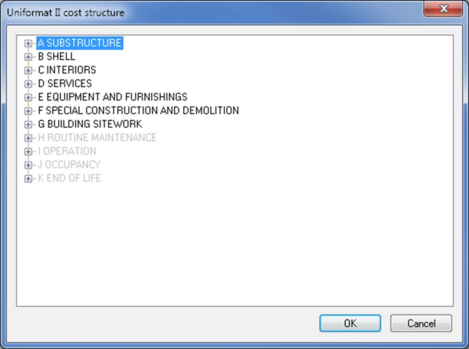
Currently there are two coding schemas available under the cost plan and lifecycle modules: UK NRM cost structure and US Uniformat II cost structure.
· UK NRM cost structure:
· US Uniformat II cost structure:
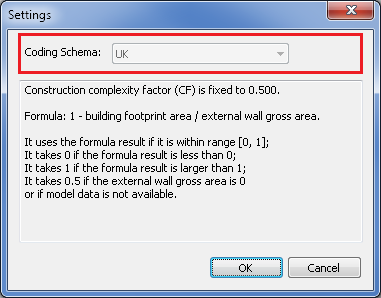
Coding Schema used under the cost plan or life cycle module will be set by global preference settings Cost DB country selection if there is any. The Settings dialog in the cost plan or life cycle module via toolbar button

will display the current coding schema:
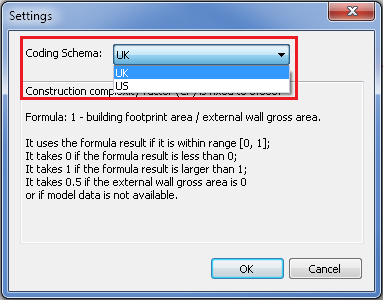
If the global Cost DB settings do NOT exist, default coding schema is used unless the users set themselves on the Settings dialog (note that the coding schema combo box now becomes selectable):