1.2 VE Interface Elements Introduction
The Main User Interface Toolbar and Menu sit at the top of the product interface. The Navigator window sits to the left of the interface, below the main toolbar. Below the Navigator is the (Room) Browser area. The Browser content will change depending on the currently active VE-Pro module. Both the Browser and Navigator display can be toggled on/off with controls on the Main Toolbar. The right hand side of the interface contains the display of the currently active VE-Pro module. Most modules will also contain their own module-specific toolbar(s).
The Navigator functions as a series of hyperlinks that are accessed within the smart navigator tree structure that is located on the upper left side of the interface. The hyperlinks take the user to the relevant VE-Pro module and / or dialog box to complete the tasks associated with that topic. When multiple Navigators are available, a drop-down selector at the top of the Navigator area allows changing between Navigators.
Note: you can increase the size (vertically and horizontally) of this area by dragging the borders between the workflows area and its surrounding areas.
Each task line in the navigator will have up to three buttons shown to the right:
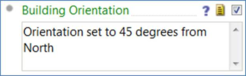
- ? – provides a link to ‘help files’ directly related to that task line
- Notes icon – when selected a ‘notes field’ will appear below, which allows the user to input specific notes related to that task for documentation purposes or to share with other team members
- Check box – provides users the ability to select and ‘check’ that task as complete. This can be important for personal or team tracking on a large or complex project.
Some Navigator entries can be collapsed / expanded to show a number of sub-actions. These lines contain a circle on the left which can be clicked.
 Some Navigator entries are dependent on previous actions having been completed. These actions will remain greyed out until the pre-requisites have been checked as completed.
Small icons at the top of the Navigator display allow the Navigator to be printed or copied to the clipboard. These print-outs or copies will contain the Notes information and checkmark information, allowing convenient project tracking.
If a Navigator entry results in a VE action or module change, the mouse cursor will change shape when it is positioned over the navigator entry, and the navigator line will turn blue. Other navigator entries serve as reminders / prompts, and the cursor will not change when hovering over these items. These items will not launch actions when clicked, but can be used to check actions or record notes.
Most modules within VE-Pro have their own User Guide, which can be accessed from the Help -> User Guides menu entry. The following modules will be used in the GM-Pro Navigator:
· ModelIT [default starting view] – Used to draw or import Model Geometry, defining zones, windows, etc.
· Singapore Compliance – used to configure model / zone activities, room types, initiate simulations etc.
· ApacheHVAC – used to configure the HVAC network