1. Background
Apache Systems are simplified Heating/Cooling systems available within the <VE>. For the Green Mark navigator, it is required to configure Apache System for DHW purposes, as well as to specify the type of cooling which is to be used in their assigned rooms.
The cooling/ventilation mechanism for an Apache system may be set to:
· Air conditioning
· Mechanical ventilation
· Natural ventilation.
For Air conditioning and Mechanical ventilation, a corresponding HVAC system must be created, and linked to the Apache System. This allows the cooling system to be modelled in detail.
2. Naming of Systems
An Apache system and an HVAC system are linked by using a common prefix in the system names. The prefix is terminated with a '=' character, without any space between the prefix and terminating character. That is:
<prefix>=<description>, where
· <prefix> is a short combination of letters and numbers. Using the same prefix in an Apache system and HVAC system name causes them to be linked.
· = is an equals sign
· <description> is a description of the system. This is not used for linking purposes so the Apache/HVAC system descriptions may differ.
Notes:
· There should be a one-to-one mapping between linked Apache and HVAC systems. The Apache system is described as a proxy for the HVAC system.
· The linked Apache system and HVAC system must have the same set of rooms assigned to them.
· Naturally ventilated systems are not linked to an HVAC system and do not need to follow the “<prefix>=<description>” naming scheme.
3. Validation
The Green Mark navigator includes an action in the “ApHVAC systems” section named “Validate proxy ApSystems against ApHVAC”. This action checks that Apache and HVAC systems which are to be linked have been named correctly.
It is important to ensure that validation is successful before continuing.
4. Building geometry and grouping
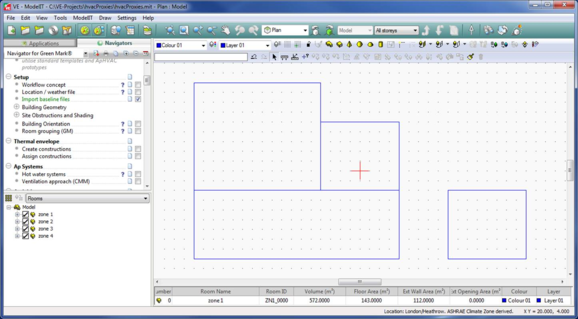
4.1. Geometry
Building geometry can be created using the ModelIT module as described in the Green Mark user guide and other <VE> user guides.
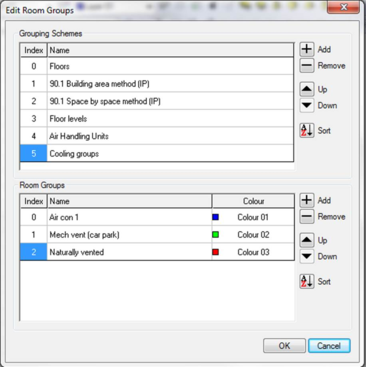
4.2. Grouping
It is useful to create a grouping scheme for HVAC room assignment, with a group for each HVAC system and another group for any nat-vent rooms. This makes it easy to assign rooms to thermal templates and into HVAC network multiplexes, as described in later sections.
Use the  button below the navigator or the “Room grouping (GM)” navigator action to launch the “Edit Room Groups” dialog.
Select a number of rooms and then press the  button below the navigator to assign those rooms to a room group.
5. Apache Systems
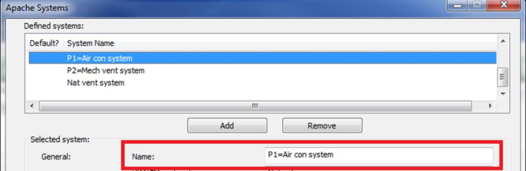
5.1. Creating Apache Systems
The “Apache Systems” dialog is launched by the “Hot water systems” navigator action.
A separate Apache system must be created for each HVAC system. Other system(s) may be added for natural ventilation.
All air conditioning and mechanically vented systems must be named using the naming scheme described earlier in this document. Each system must use a different prefix.
Each system must have the correct “Cooling/ventilation mechanism” setting.
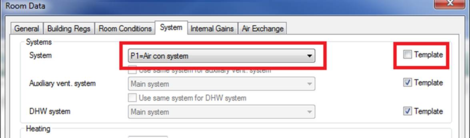
5.2. Assigning systems to rooms
Each room may be assigned to three Apache systems:
· System (referred to as HVAC system in the Building template manager)
· Auxiliary vent system
· DHW system
For the purposes of Apache to HVAC system linking, only the main “System” setting is used.
5.3. Using thermal templates
The easiest way to configure the Apache system for a room is to define a thermal template which sets the Apache system and then assign rooms to the template.
Then select the appropriate room group (or select rooms manually) and use the “Assign templates to spaces” navigator action.
5.4. Individual Selection
It is also possible to override the template setting on a room-by-room basis.
Enter compliance mode and select the “Real model” building.
Select a single room and use the  button in the toolbar to open the “Room Data” dialog.
This is not necessary if using thermal templates, as described above.
6. HVAC systems
6.1. Importing HVAC systems
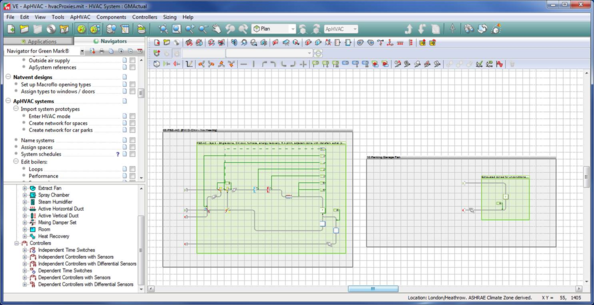
Prototype systems are imported into the current HVAC network using the “Import Systems” dialog.
This dialog is displayed when entering the ApHVAC module and can also be displayed by pressing the  button on the toolbar.
6.2. Naming HVAC systems
Each HVAC system must be linked to a corresponding Apache system by following the naming scheme described in a previous section.
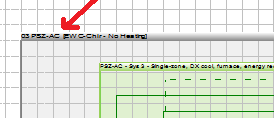
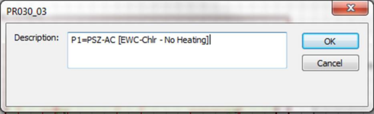
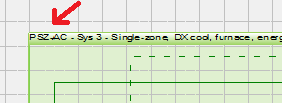
To rename a system, double-click the grey title bar of the box which encloses the system.
Rename the system to include the same prefix as the corresponding Apache system.
6.3. Assigning rooms to HVAC systems
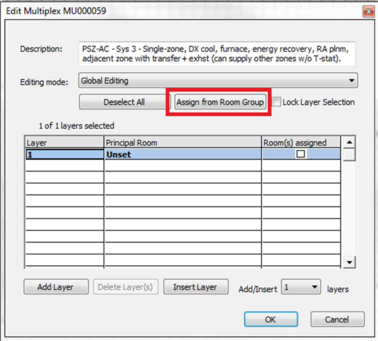
In the Green Mark HVAC systems, rooms are stored in a multiplex. To assign rooms to the multiplex, double-click the green title bar of the box which surrounds the multiplex.
This opens the “Edit Multiplex” dialog. The easiest way to assign rooms to a multiplex is using room groups, as described in a previous section.
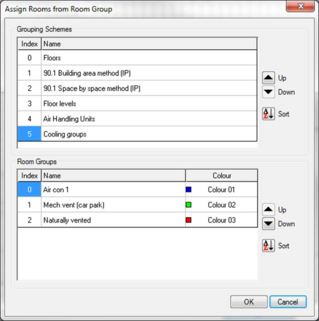
Select the grouping scheme defined earlier and the appropriate room group.
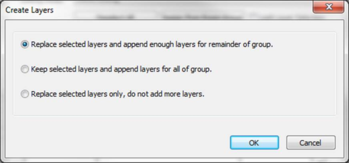
In most cases, it is convenient to replace existing layers.
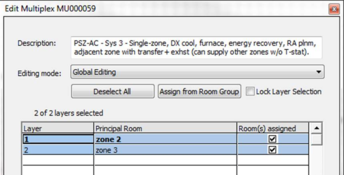
The dialog now shows that the rooms have been assigned to the multiplex.
Check the network using the  button and then save it using the
  button, both available on the toolbar.
7. Validation
If Apache and HVAC systems have been defined as described above then validation should be successful.
If validation fails, the error message gives an indication of the problem and can be used to make the necessary corrections.
Checks to perform:
· Are both Apache and HVAC systems named correctly, with no blank space between the prefix and the ‘=’ character?
· Is the Cooling/ventilation mechanism setting correct for the Apache system?
· Are rooms assigned to the correct Apache system? (Check the “Room Data” dialog)