This example shows the use of both the calculation methods:
· Designing the layout using the Design command.
· Analysing the layout using the Analysis command.
Designing the Layout Using the Design Command
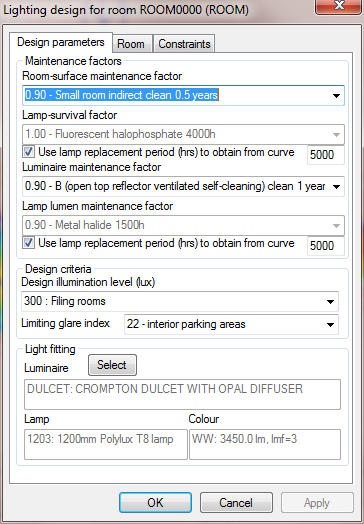
Select a room and invoke the Design command. This brings up the Design dialogue box, which is a property sheet with three pages.
Set an appropriate illuminance level and glare limit, and leave the rest of the data unchanged. Close the dialogue box. The design calculations then proceed until the Design results dialogue box is displayed.
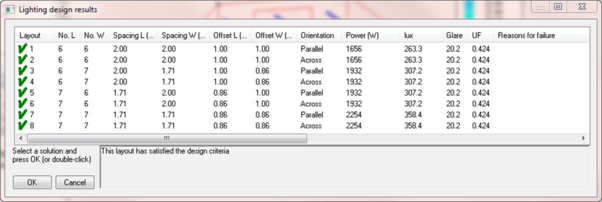
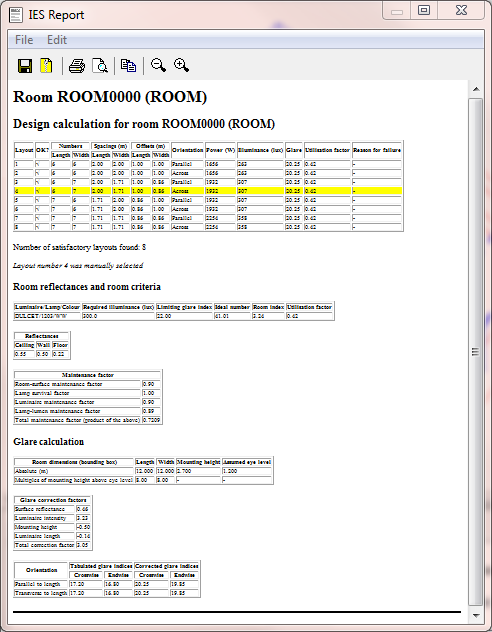
Double-click a solution with a tick next to it. This closes the dialogue box, and another dialogue box shows you a summary of the FlucsPro design calculations.
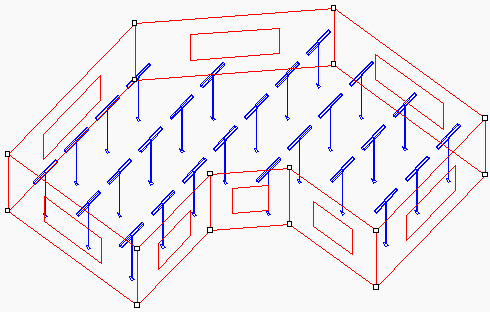
Close this dialogue box, and observe that the room is now populated with the selected layout. Note you must make sure that the tool for displaying luminaires is selected:
Analysing the Layout Using the Analysis Command
Make sure the same room is selected and that contour levels are toggled on (for faster display update). Invoke the Analysis command. This brings up the Analysis dialogue box:
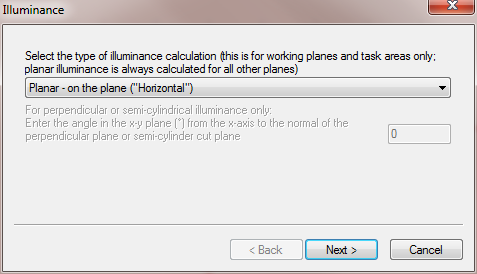
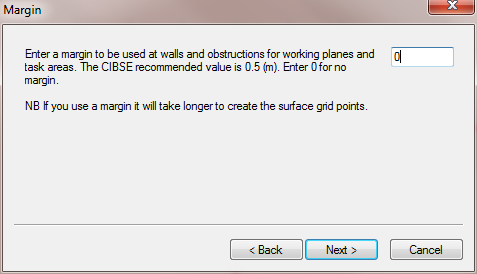
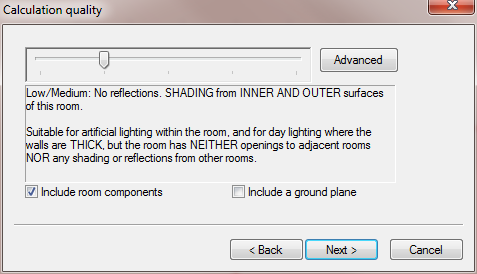
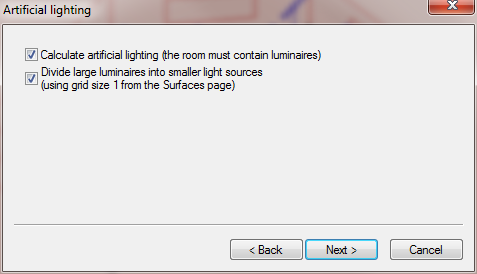
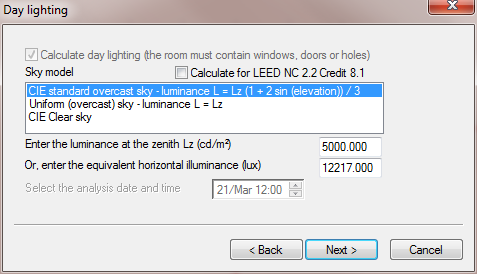
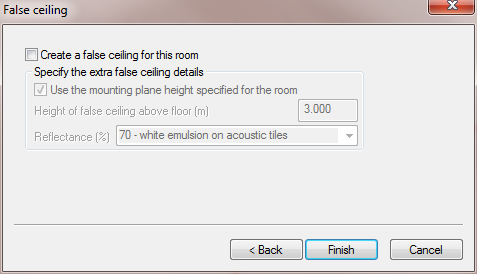
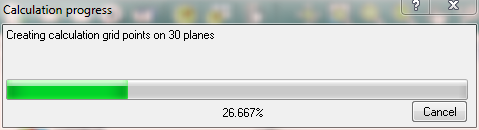
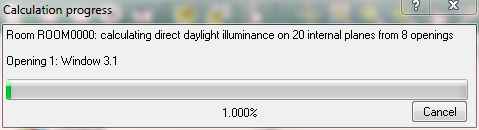
Step through the Wizard, entering values as shown on the diagrams. If you wish you may turn on “Full inter-reflections” in the Advanced quality settings dialogue, Reflections tab. Press Finish. The calculations then proceed. At each phase the Progress dialogue box will show the progress.
For example, while creating the surfaces and grid points for the calculation:
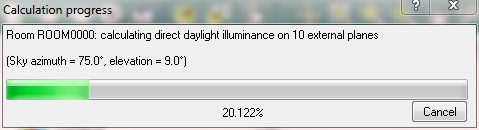
While calculating day lighting on the internal surfaces from the external openings (for efficiency this only looks at patches of sky that can be seen through openings from the internal surfaces):
While calculating daylight on external surfaces (this is treated differently in daylight calculations – each patch of sky is treated as a source of light):
NB Daylight calculations may take quite a while if you have large windows.
While performing the full inter-reflection calculations using progressive radiosity (this also may take a long while):
NB The full inter-reflection calculation may not converge very quickly if there are a large number of small patches in a room.
You may press the Cancel button at any time - if so you will be asked if you really wish to cancel. The screen will be updated periodically to show the latest results. This can be useful when you are performing the full progressive radiosity inter-reflection calculation. If screen refresh is taking too long on large models, try turning this off by pressing the Hide lighting levels button on the toolbar.
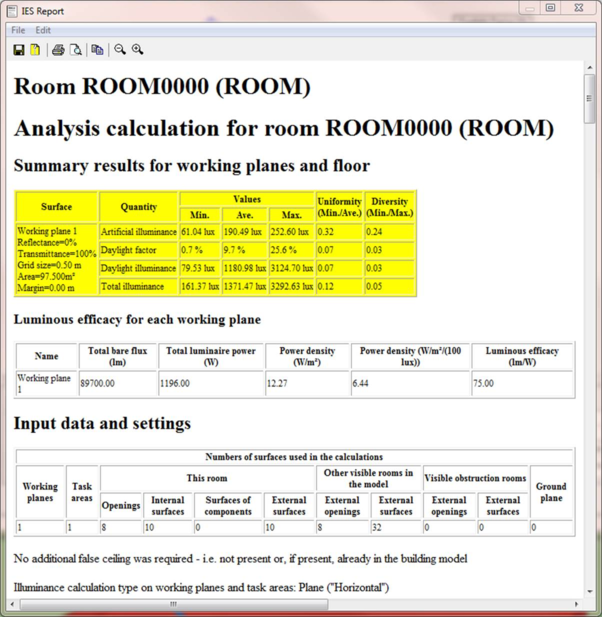
When the calculations are finished the Analysis Results dialogue box is displayed. The first page is shown below (but not the whole results as there are quite a lot).
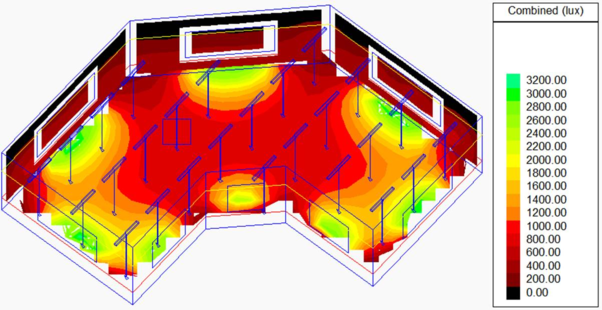
When this is closed you can use the commands to change the way the data is displayed.
Select some surfaces using the mouse or the Surface browser. Then use the various buttons to see the effect they have on the display.