The integration of the HTM system support into the VE provides a fast, streamlined and easy-to-use method of simulating the effect of HTM units within your VE building model. A dedicated Navigator is used to guide you through the step-by-step process, from importing the units into your model, configuring their operation, preparing and applying to rooms, thermal simulation and review of the results.
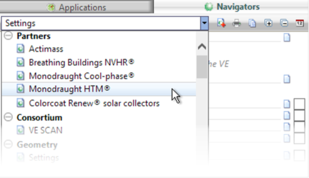
To get started, click on the dropdown list of available Navigators at the top of the Navigators pane (if the pane is not visible on the left side of the VE window, you can turn it on using the button on the application toolbar, or by selecting Navigator from the view menu). You will find a Monodraught HTM® entry listed under the Partners section.
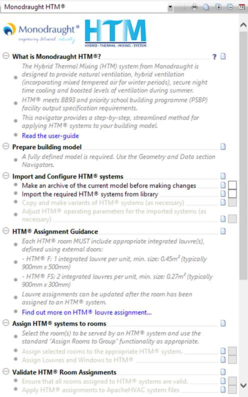
When selected, the Monodraught HTM® navigator will be displayed. This is what you will use to go through the process of applying HTM to your building, simulating and analysing the results.
In order to start using the navigator, you will need to have a fully defined VE model already created and loaded. This model should contain valid geometry representing the building, and may also be set up with valid data (e.g. heating set-points, cooling set-points, Apache systems, internal gains, air exchanges, MacroFlo openings) already assigned to the rooms. As the assignment of HTM to rooms will make direct modifications to the assigned data, it is always recommended that you make a back-up of your model prior to commencing the HTM integration – this will allow you to have a baseline that you can easily revert back to in the event of any issues. You can do this by clicking the Make an archive of the current model before making changes item in the navigator, or by selecting the Current Project item from the File->Archive menu.
Once completed, you will be ready to start using with HTM in your building model.

 In order to start using the navigator, you will need to have a fully defined VE model already created and loaded. This model should contain valid geometry representing the building, and may also be set up with valid data (e.g. heating set-points, cooling set-points, Apache systems, internal gains, air exchanges, MacroFlo openings) already assigned to the rooms. As the assignment of HTM to rooms will make direct modifications to the assigned data, it is always recommended that you make a back-up of your model prior to commencing the HTM integration – this will allow you to have a baseline that you can easily revert back to in the event of any issues. You can do this by clicking the Make an archive of the current model before making changes item in the navigator, or by selecting the Current Project item from the File->Archive menu.