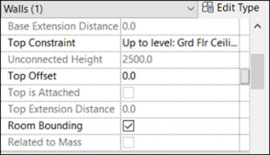
Within Revit there is a setting for elements such as walls to be defined as ‘room bounding’. Elements with this setting will affect the room volumes and geometry quality when exported via the format of choice, whether it is gbXML or IFC.
Image from Autodesk Revit: Properties dialogue – Room Bounding option
It is good practice at the outset of the model creation to choose which elements are going to be set as the primary ‘room bounding elements’, i.e. one floor/ceiling/roof element and one internal/external wall element. All other elements placed within the model can be included to show design intent but have this setting unticked to avoid them interfering with the gbXML or IFC file exported from the BIM model.
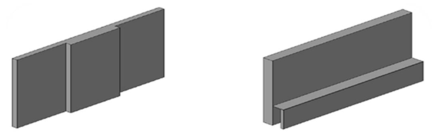
An example might be internal partitions creating cubicles in a restroom/toilet – setting these to non-room-bounding greatly simplifies the room geometry. In the examples below the wall has been detailed out and is thicker in the middle. This detail would either need to be modelled as two separate walls with only the primary wall set with ‘room bounding ‘on or with the detail removed. In the other example the low sill can be left in the BIM model for design intent but again the ‘room bounding’ unticked within the element properties.
Images from Autodesk Revit: Wall of varying thickness (left) and wall with lower sill (right)
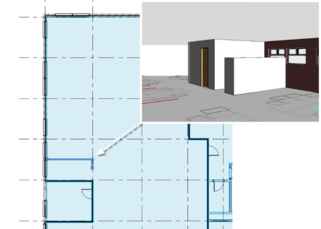
Another example illustrated in the image above is the scenario of a half-height partition denoting a printer bay. In an energy model this area could be absorbed into the main space. From an architectural perspective it would need to remain to show design intent. The solution is to follow the methodology above and place the partition into the Revit model but untick the ‘Room Bounding’ option within the properties dialogue.